LLM Generate
Overview
LLM Generate is a core component of Astera’s AI offerings, enabling users to retrieve responses from an LLM based on input prompts. It supports various providers like OpenAI, Llama, and custom models, and can be combined with other objects to build AI-powered solutions. The object can be used in any ETL/ELT pipeline, by sending incoming data in the prompt and using LLM responses for transformation, validation, and loading steps
This unlocks the ability to incorporate AI-driven functions into your data pipelines, such as:
Template-less data extraction
Natural language to SQL Generation
Data Summarization
Data Augmentation
Use Case
LLM Generate can be used in countless use cases to generate unique applications. Here, we will cover a simple use case, where LLM Generate will be used to classify support tickets.
The source is an Excel spreadsheet with customer support ticket data.
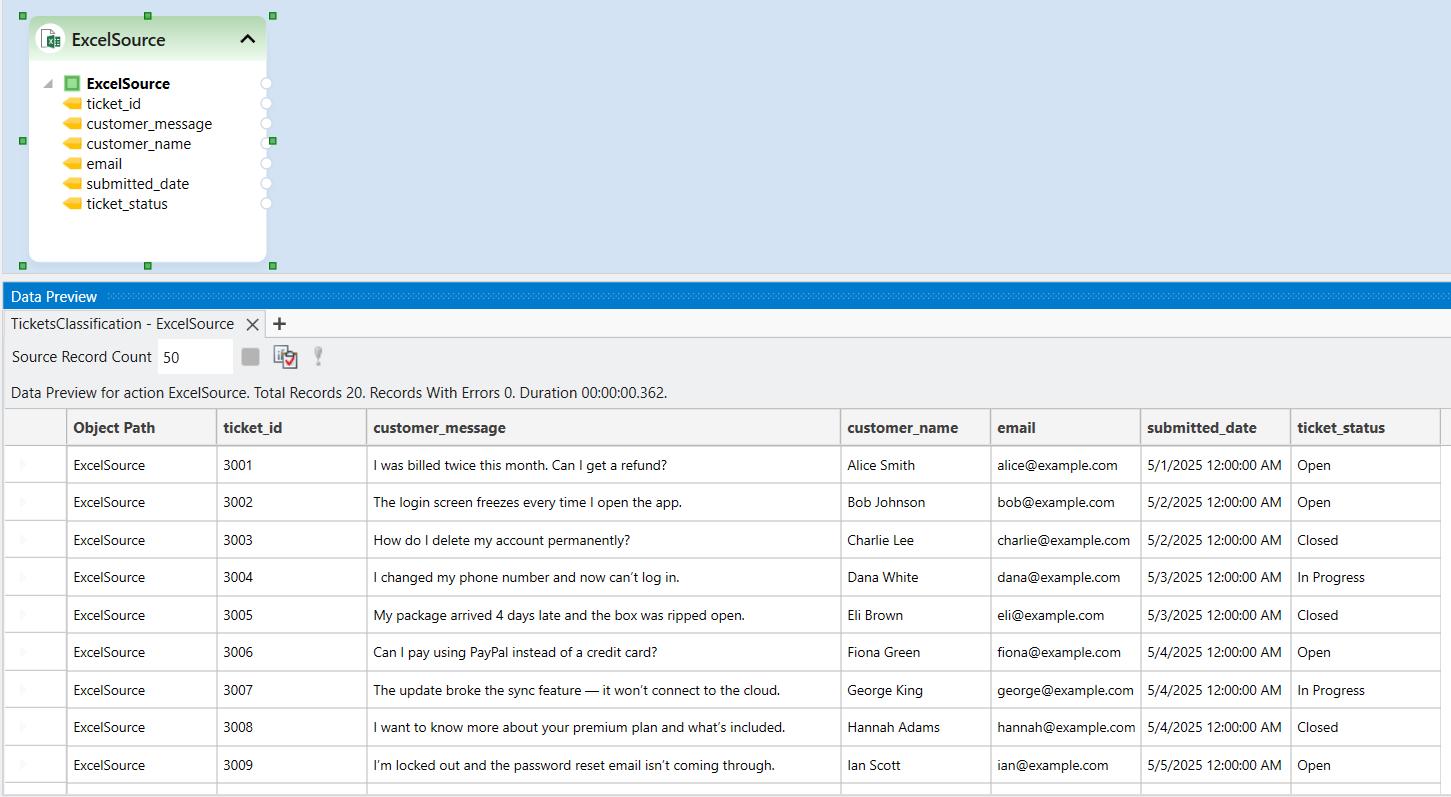
We want to add an additional category field to the data, which will contain one of the following tags based on the content of the customer_message field:
Billing
Technical Issue
Account Management
Delivery
Product Inquiry
This use case requires natural language understanding of the customer message to assign it a relevant category, making it an ideal use case for LLM Generate.
How To Work with LLM Generate
Drag-and-drop an Excel Workbook Source object from the toolbox to the dataflow as our source data is stored in an Excel file.
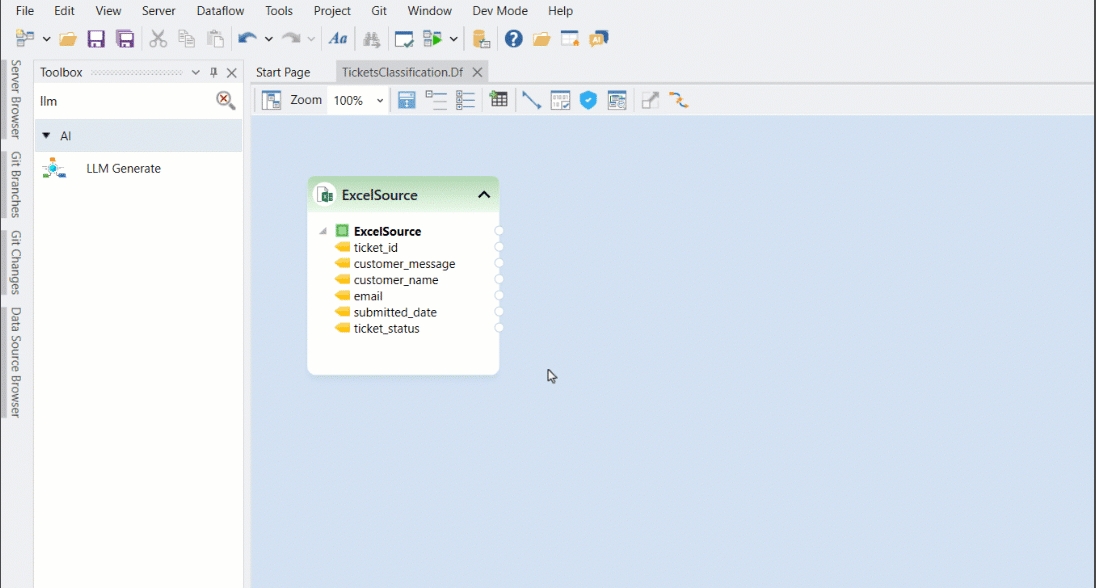
Now we can use the customer_message field from the Excel Source and provide it to the LLM Generate object as input, along with a prompt containing instructions that will populate the category field with a category. To do this, let's drag-and-drop the LLM Generate object from the AI Section of the toolbox to the dataflow designer.
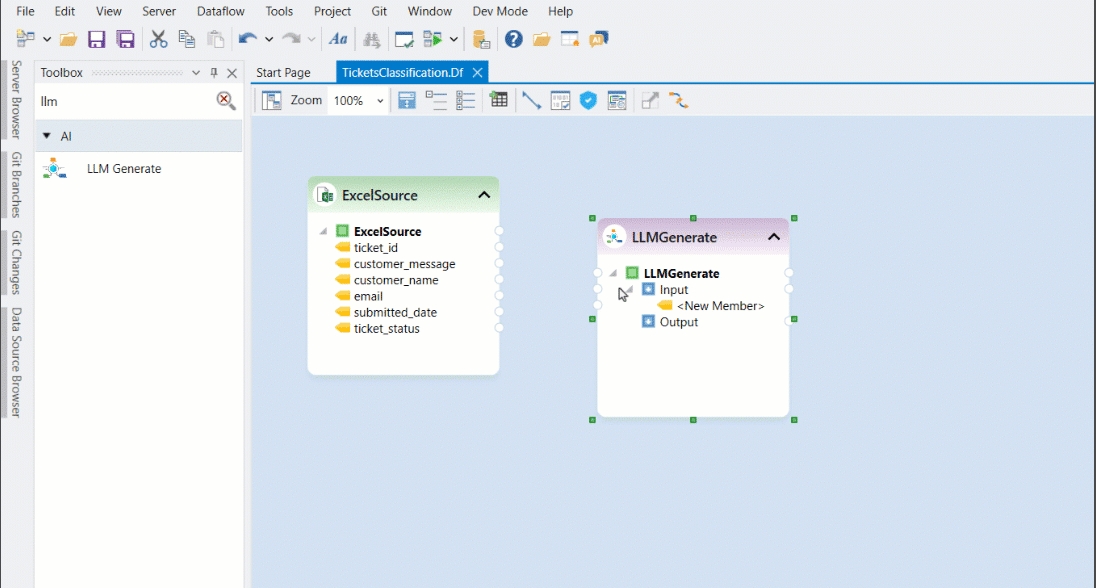
To use an LLM Generate object, we need to map input field(s) and define a prompt. In the Output node we get the response of the LLM model, which we can map to further objects in our data pipeline.
Other configurations of the LLM Generate are set as default but may be adjusted if required by the use case.
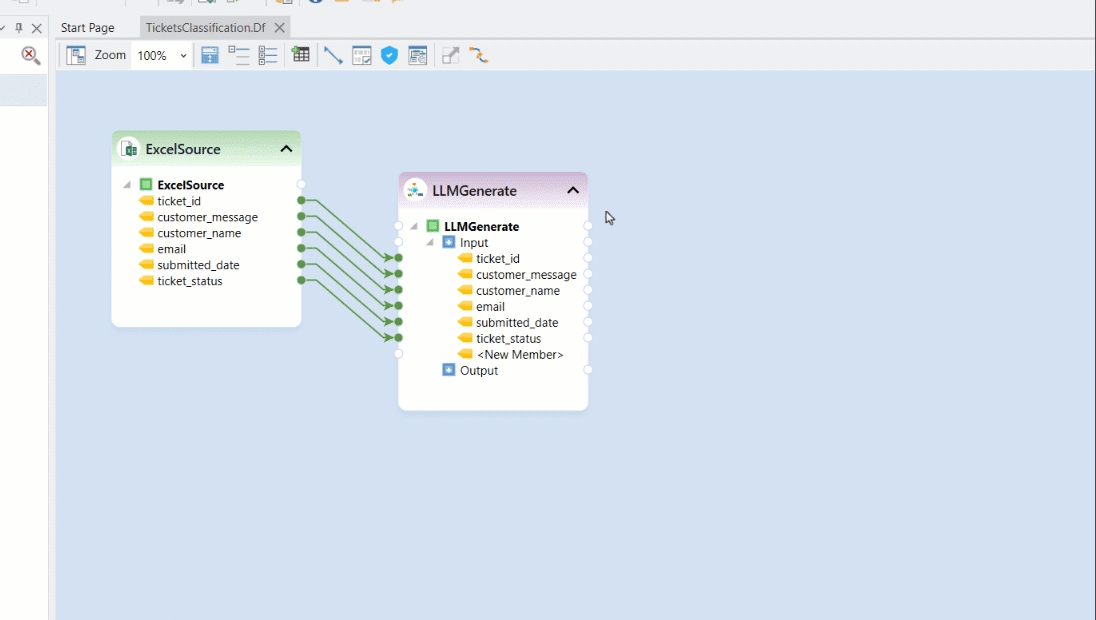
As the first step, we will auto-map our input fields to the LLM Generate object’s input node. We can map any number of input fields as required by our use case. These input fields may or may not be used inside the prompt. Any fields not used in the prompt will still pass through the object and can be used unchanged later in the flow.
The next step is to write ta prompt that serves as instructions for the LLM to generate the desired output. Right-click on the LLM Generate object and select Properties, then click the Add Prompt button at the top of the LLM Template window to add a prompt.
A Prompt node will appear containing the Properties and Text fields.
Prompt Properties
Prompt properties are set by default. We can click the Properties field to view or change these settings. The default configuration is as shown in the image below:
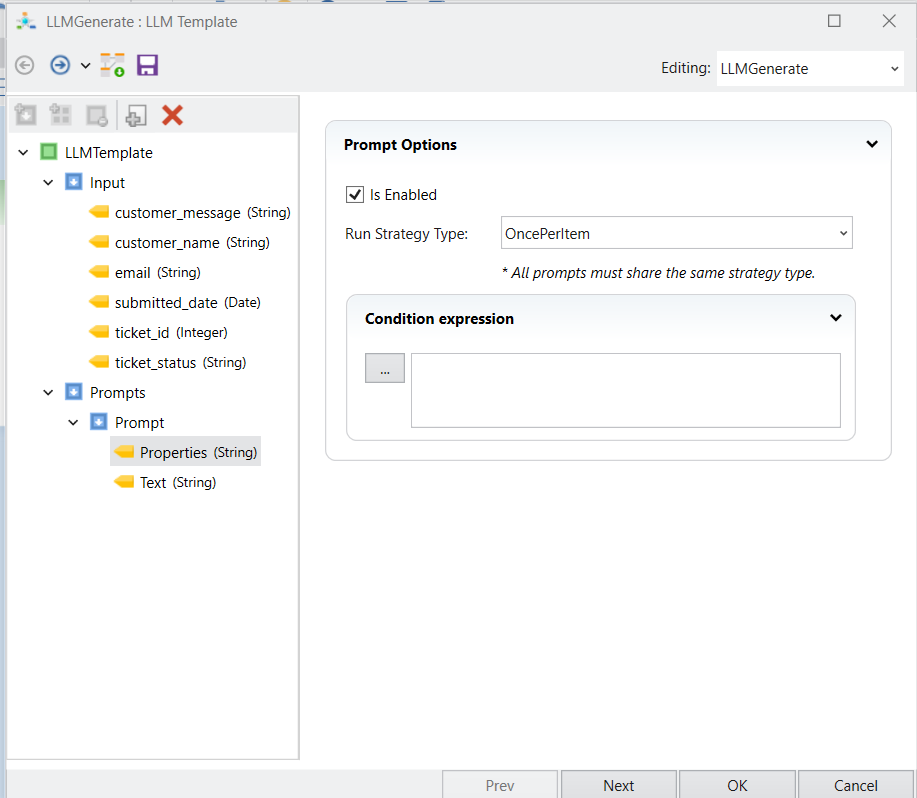
Let’s quickly go over what each of these options means:
Run Strategy Type: Defines the execution of the object based on the input.
Once Per Item means the object runs once for each input record. Use this when the input has multiple records and LLM Generate is required to execute for each one.
Chain means the object uses the output of one prompt as input for the next within the LLM Generate object. Use
{LLM.LastPrompt.Result}to use the previous prompt's output, and{LLM.LastPrompt.Text}to use the previous prompts text itself.
Conditional Expression: Specify the condition under which this prompt should be used. Useful when you want to select one prompt from several based on some criteria.
For our use case, we will be using default settings of the Prompt Properties.
Prompt Text
Prompt text allows us to write a prompt consisting of instructions, which is sent to the LLM model to get the response in the output.
In the prompt, we can include the contents of the input fields using the syntax:
{Input.field}
In the above syntax, we can provide the input field name in place of field.
We can also use functions to customize our prompt by clicking the functions icon.
For instance, the following syntax will resolve to the first 1000 characters of the input field value in the prompt:
{Left(Input.field,1000)}
For our use case, we will write a prompt that instructs the LLM to classify the customer message into one of the categories we have provided in the prompt.
Click Next to move to the next screen. This is the LLM Generate: Properties screen.
Properties
Let's see the options provided here:
General Options
AI provider: Select your desired AI provider here (e.g. OpenAI, Anthropic, Llama)
Shared Connection: Select the Shared API Connection you have configured with API key of the provider.
Model Type/Model: Select the model type (if applicable) and choose the specific model you want to use.
Ai SDK Options
Ai SDK Options allows us to fine-tune the output or behavior of the model. We will discuss these options in detail in the next article.
For our primary use case, of support ticket classification, we are using OpenAI as our provider, gpt-4o as our model and default configurations for other options on the Properties screen to generate the result.
Now, we’ll click OK to complete the configuration of the LLM Generate object.
We can right-click on the LLM Generate object and click Preview Output to preview the LLM response and confirm that we are getting the desired result. We can see that the LLM response gives the category of the support ticket based on the customer message.
Writing to Destination
We can now use the LLM’s result in other objects to transform, validate or just write it. Let’s say we want to write the enriched support ticket data to a CSV destination.
To do this, let's drag-and-drop a Delimited Destination from the toolbox.
Next, let's map the original fields to the Delimited Destination object and create a new field called Category. The LLM’s Result field can be mapped to this Category field.
Our dataflow is now configured; we can preview the output of our Delimited Destination to see what the final support ticket data will look like.
We can also run this dataflow to create the delimited file containing our enriched support ticket data.
Summary
The flexibility of LLM Generate to provide an input and give natural language commands on how to manipulate the input to generate the output makes it a dynamic universal transformation object in a data pipeline. There can be countless use cases for LLM Generate. We will cover some of these in the next articles.
Was this helpful?