Using Dynamic Layout & Template Mapping in Astera
The Dynamic Layout/Template Mapping feature in Astera enables automatic and dynamic changes to be implemented in flows in case of any alterations in a database source system. Further, this feature also enables users to create a template dataflow that can be used to process multiple files and generate copies of the same dataflow, without having to change the mapping links individually for each source dataset. Upon execution, Astera will replace the values dynamically and these changes will be visible in the destination file or table.
Benefits of Template Mapping and Dynamic Layout
Running your routine processes does not require you to design, modify, and map your ETL flows every time.
ETL pipelines can be run without any dependence on the development environment.
Template mapping also facilitates scheduling repetitive, routine jobs for automation.
Using runtime parameters, you can customize your templates to suit your changing requirements.
Template mapping makes it more convenient for non-technical users to customize and deploy these templates in different business scenarios.
In this document, we will learn how to use the Dynamic Layouts/Template Mapping functionality in Astera Data Stack.
Use-Case
For this use-case, we will look at how the Dynamic Layout and Template Mapping features in Astera may behave in case fields from users’ database sources are deleted or if additional fields need to be added.
First, let’s drag-and-drop a Database Table Source object from the Toolbox onto the designer.
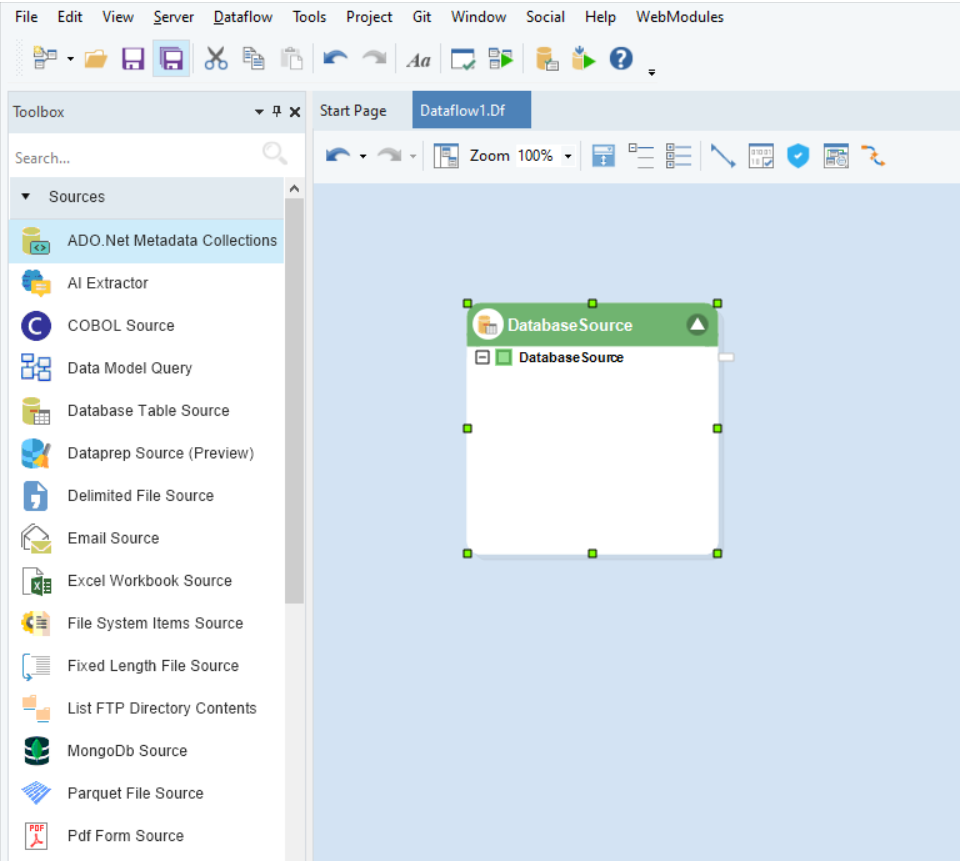
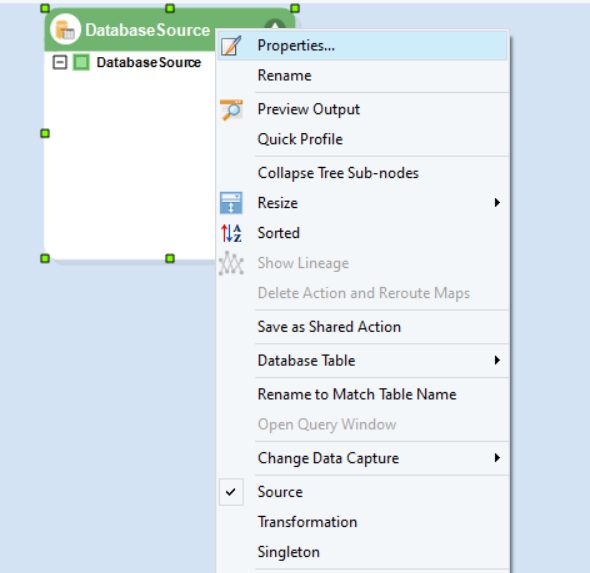
Now, right-click the object header and select Properties from the context menu. In the Database Connection window, configure a connection to a database and click Next.
In the Pick Source Table and Reading Option window, select a table and check the Dynamic Layout option in the Dynamic Layout section.
The Dynamic Layout option essentially allows for altered fields to be catered for without impacting an automated Workflow or ETL pipeline. Therefore, if, for example, a field in a database table is being deleted or added by the user, the tool will not halt any flows due to errors, instead it will simply ignore the field in case of deletion and add a field in case of addition of a new field to the database table.
Checking the Dynamic Layout option enables the two following options, Delete fields in Subsequent Objects, and Add Fields in Subsequent Objects. These options can also be unchecked by users.
Delete Fields in Subsequent Objects: Checking this option ensures that a field is definitely deleted from subsequent objects in a flow in case of deletion from the source database.
Add Fields in Subsequent Objects: Checking this option ensures that a field is definitely added in subsequent objects in a flow in case additional fields are manually added in the source database by the user or need to be added into the source database.

Essentially, these options ensure that any alterations in the source database are reflected further down the flow. For now, we will leave these as default as we will be discussing both the deletion and addition of fields.
Once done, we will click OK to close the window.
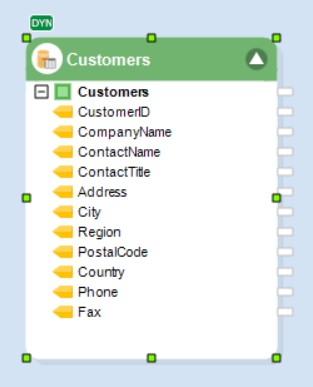
As evident in the screenshot below, the source object has been given a “DYN” label, indicating the now dynamic nature of the source object.
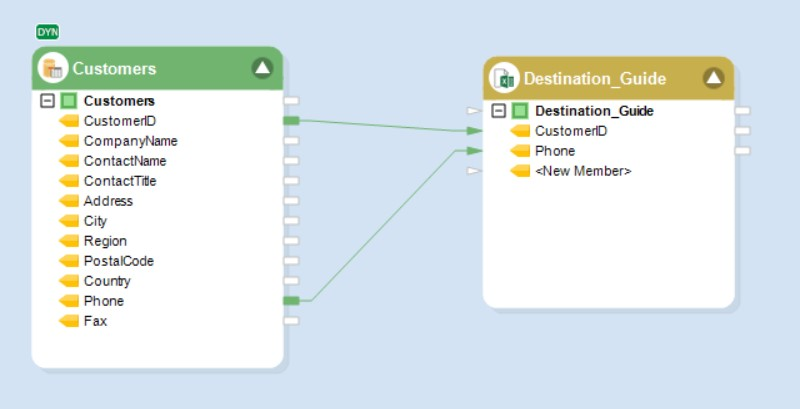
Now, we will add an Excel Workbook Destination object to the designer and configure it. Once done, we will map a single field from the Customers source object to the Destination_Guide destination object.
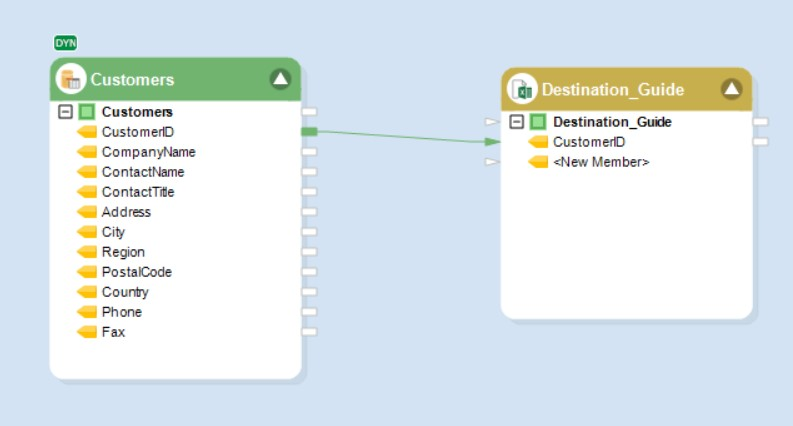
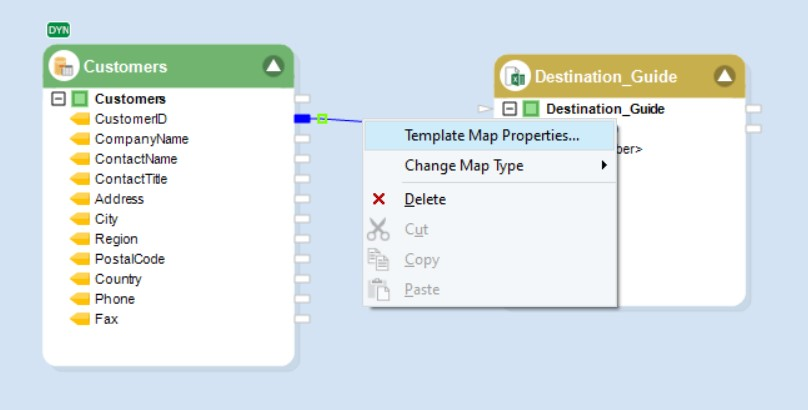
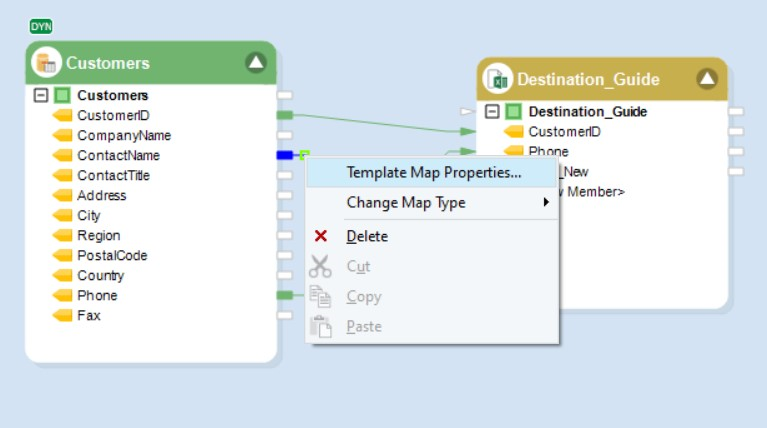
Next, we will right-click the mapping and select the Template Map Properties option from the menu. A Template Map Properties window will open.
There are two types of Template Mappings: Guide Mapping and Conditional Mapping.
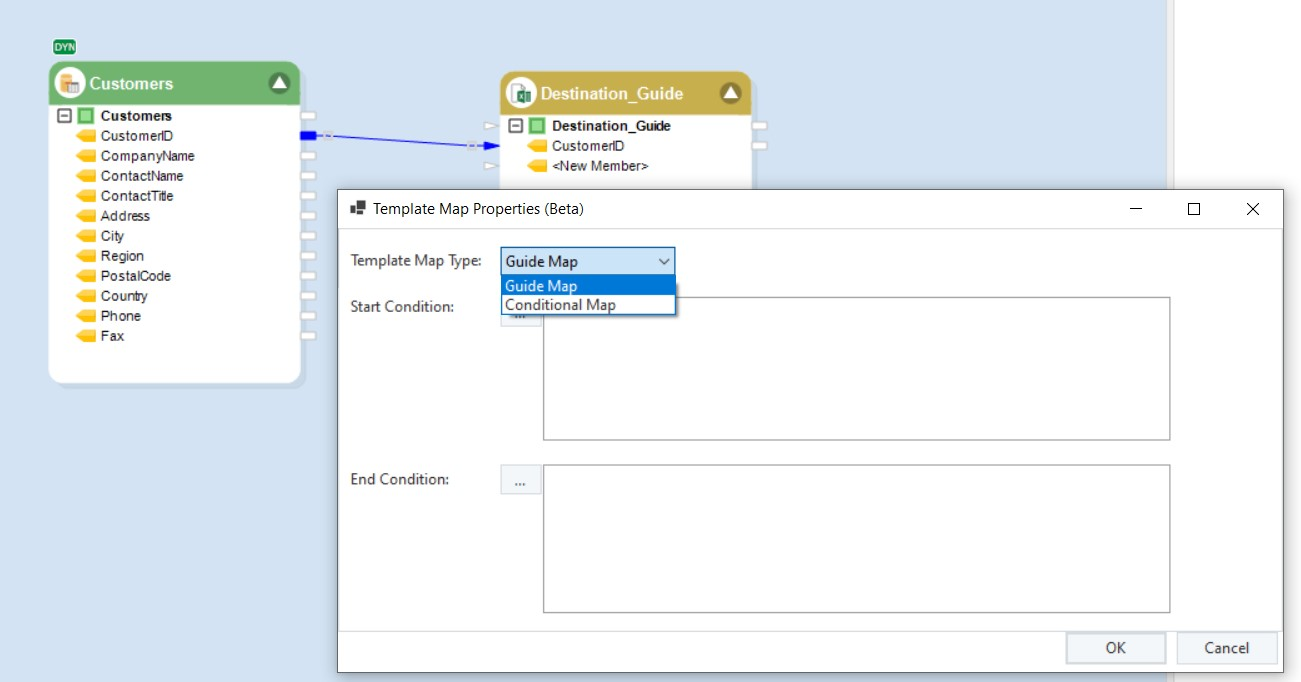
Guide Map: This mapping link establishes a connection between two objects in a Dataflow, specifying how data moves between them. The Guide Map operates independently of specific fields in the source object, focusing solely on defining the data path from the source to the destination, without concern for the particular field it connects to.
Conditional Map: Conditional Maps are employed to define specific conditions, which, when met, trigger automatic modifications to the destination database or file.
Template Mapping - Guide Maps - Adding and Deleting Fields
In the Template Map Properties window, select Guide Map from the Template Map type drop-down. Once done, click OK to close the window.
Now, we will manually delete the Fax field that exists in our source database and add an AlternatePhone field in the database table.

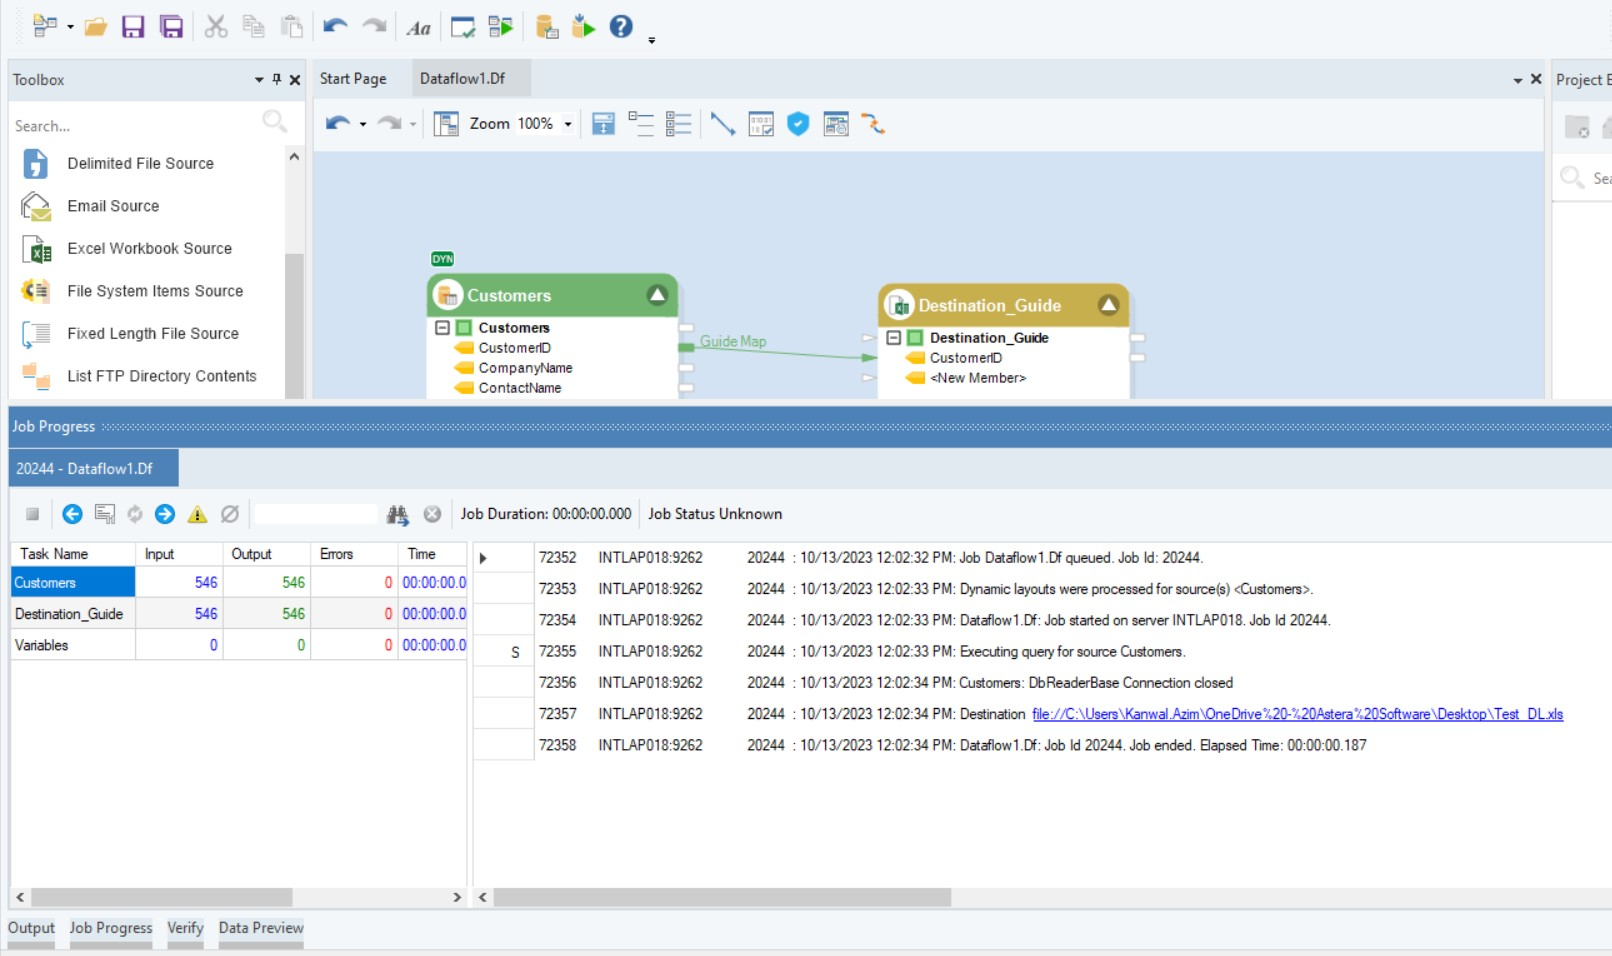
Now, let’s run this flow by selecting the Start Dataflow icon.
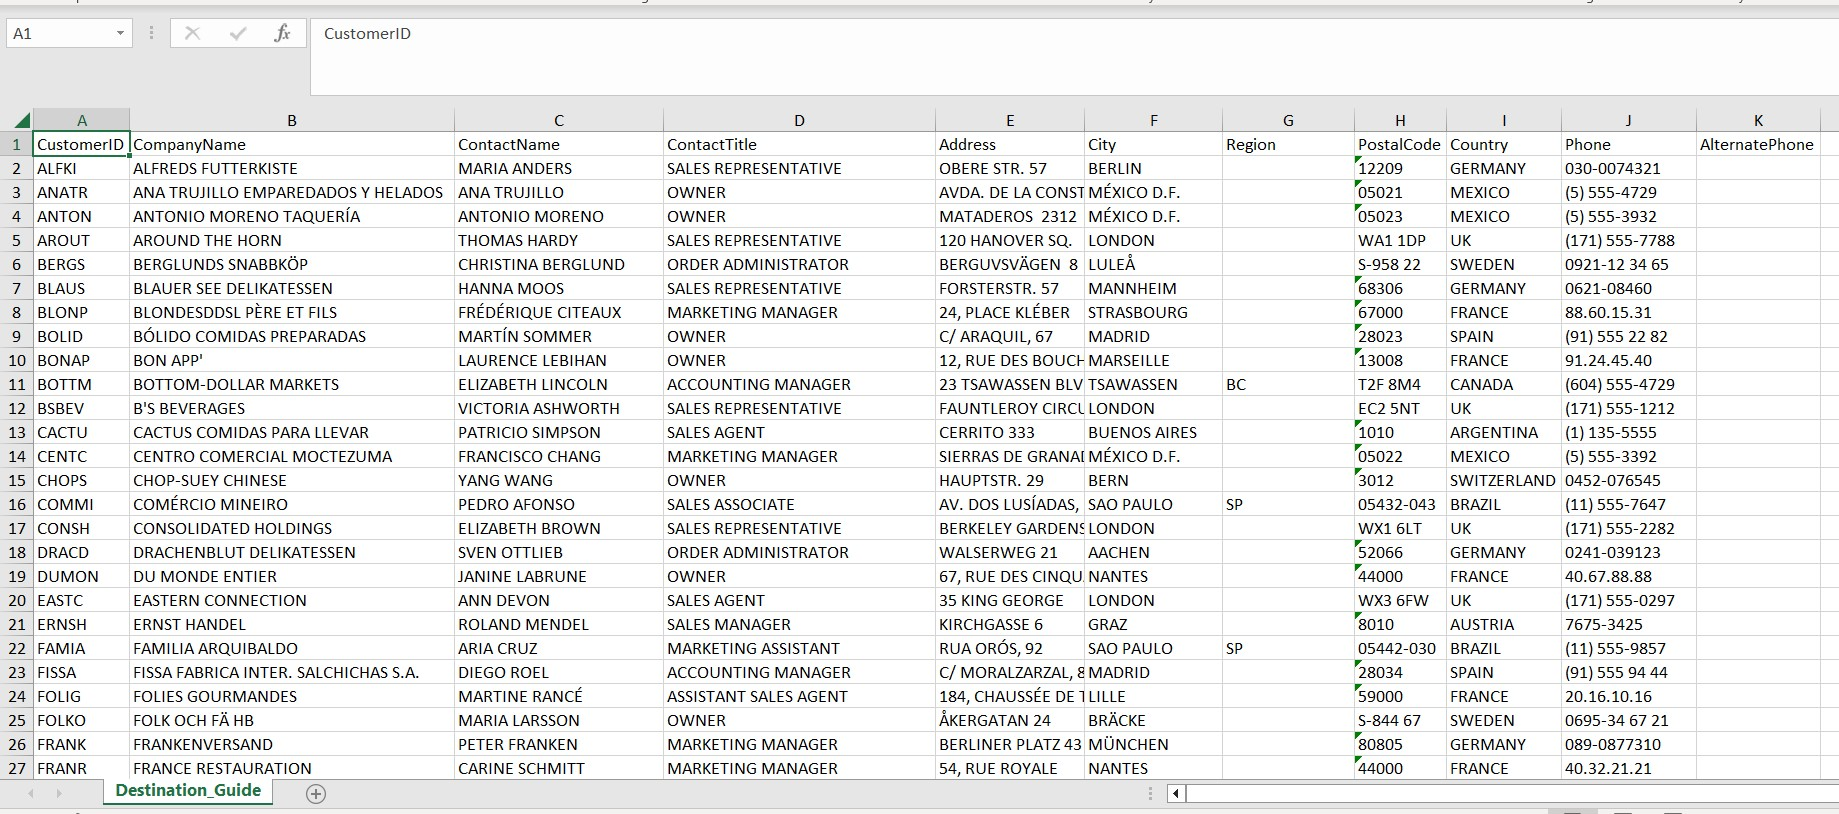
A Job Progress window will pop up. Here you can see that the tool has not halted the flow due to any errors. Instead, if we open the newly created Excel file, we can see that the tool has ignored the deleted Fax field and added an AlternatePhone field.
Template Mapping - Conditional Maps - Adding a Conditional Field
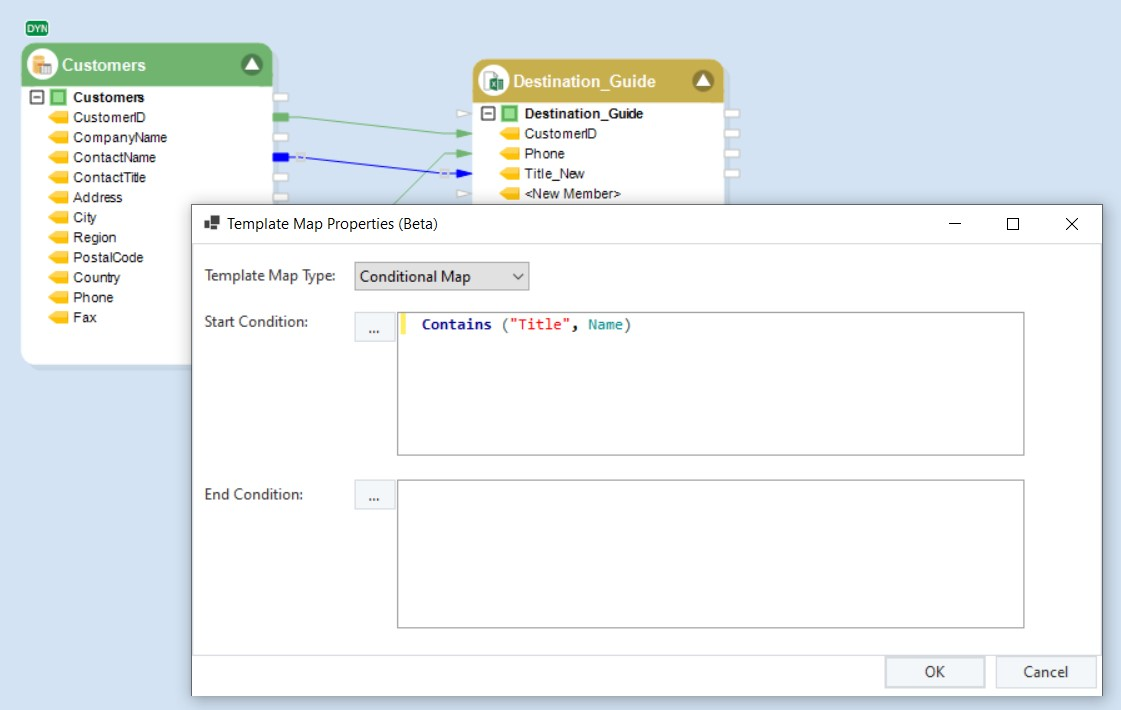
Now, we will use conditional mapping in such a way that if a field name consists of the word “Title”, it must be written to a Title_New column in the destination file, while ensuring that the CustomerID and Phone fields are also present in the destination file as they are.
To do this, let’s first get rid of any previous mappings. Once done, we will map the Customer ID and Phone fields to the destination object.
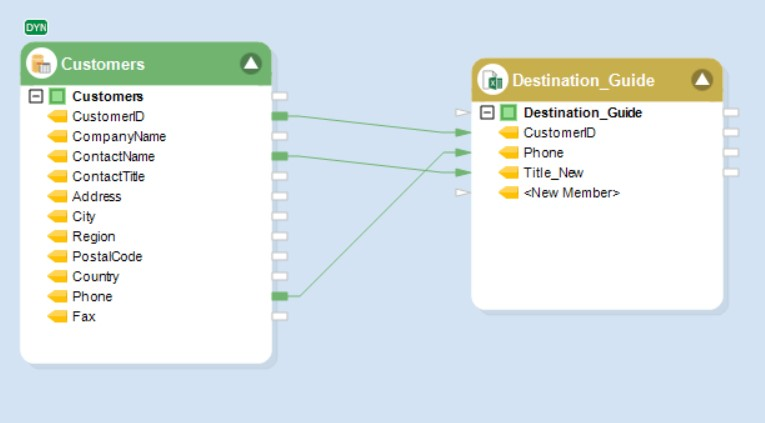
Next, we will create a new field, labeled Title_New, in the destination object and map the ContactName field from the source object to the destination object node labeled Title_New.
Note: For this use-case, we are mapping the ContactName field, however, any field can be mapped to the destination object for specifying conditions through mappings.
Now, we will right-click the ContactName mapping and select the Template Map Properties option from the drop-down.
In this window, we will select Conditional Map from the Template Map type drop-down.
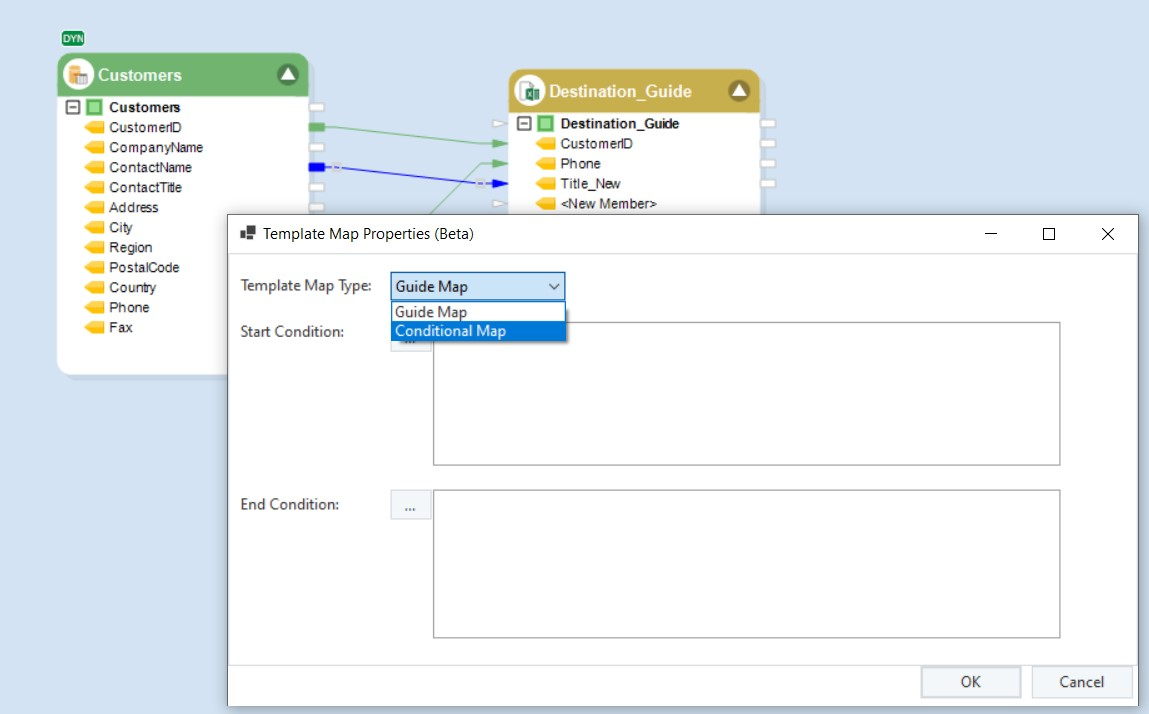
Next, we will specify the following condition in the Start Condition box: Contains ("Title", Name)
Note: If we select the ellipses option next to the Start Condition box, in the Expression Builder, we can see the various parameters related to the metadata of the source and destination files, that can be used in conditions.
Once done, click OK to close the window.
Now, let’s run the Dataflow by selecting the Start Dataflow icon in the toolbar. As we can see in the newly created Excel destination file, when compared to the source data previewed in the Data Preview window, the CustomerID and Phone fields have been mapped as they are, while all the data in the ContactTitle field has been written to the field labeled Title_New.
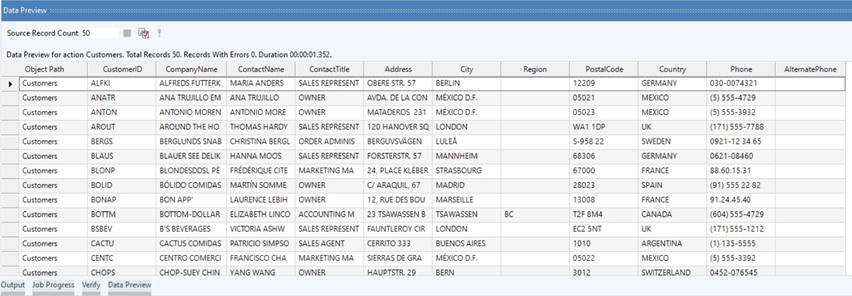
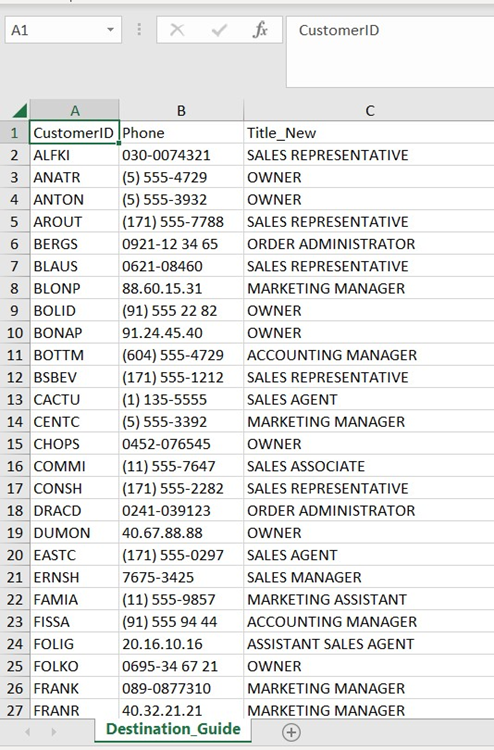
Note: Conditional mapping always maps the first instance of the specified rule being met. Hence, if our source file consisted of another field with a name containing “Title”, conditional mapping will prompt the tool to only map data from the first field containing “Title” in the name, thus the ContactTitle field in our use-case.
This concludes using the Dynamic Layout and Template Mapping features in Astera.
Note: Please note that this is a beta version of the feature. The functionality is still in the testing phase and could change as we get user feedback on this feature. Should you have any suggestions or feedback, or come across a bug, please report to our Support Site or email us at [email protected].
Was this helpful?