MongoDB Destination
MongoDB is a document-oriented database in which one collection holds different documents. The MongoDB Destination object in Astera Data Stack, provides functionality to write data onto it. This component provides functionality to control how data should be written in collections.
While writing data, the number of fields, content, and size of the document can differ from one document to another. This can be easily catered to by including configurations on write concerns that describe level of acknowledgment from MongoDB for write operations.
MongoDB is mainly used for Big Data.
Using the MongoDB Destination object in Astera
The MongoDB Destination object can be used to map incoming data from a source to the MongoDB server. MongoDB makes it easier for users to store structured and unstructured data both.
For our use case, we already have an XML/JSON Source object configured in a Dataflow.
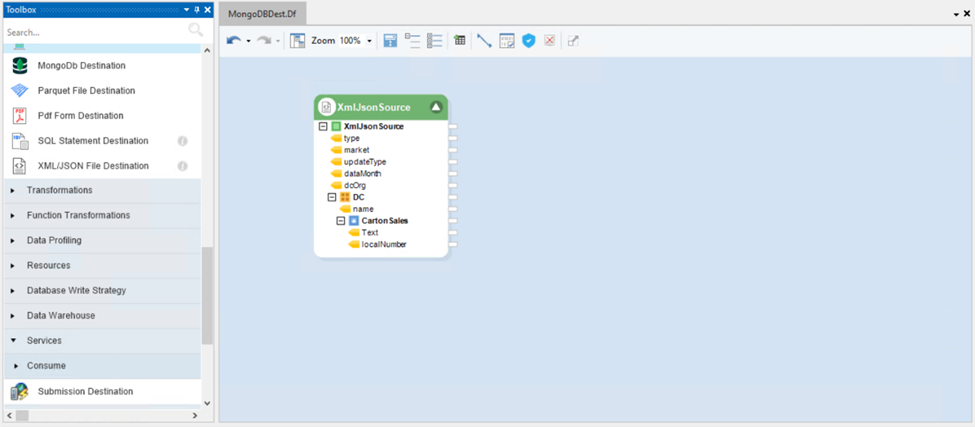
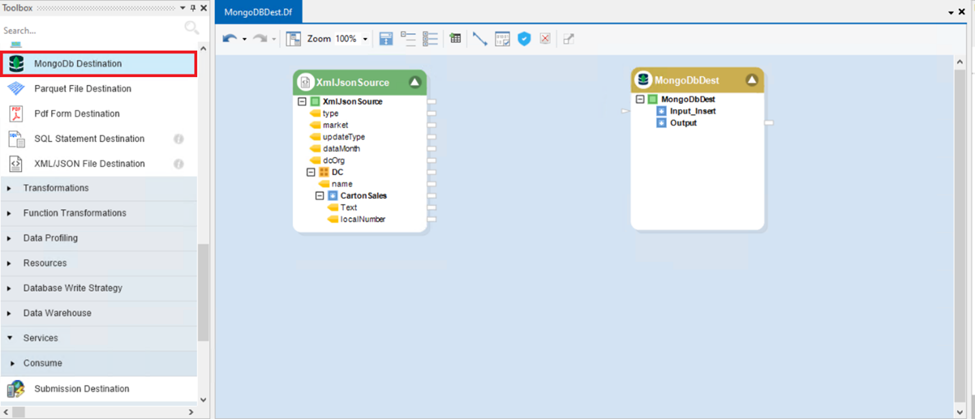
To start, drag-and-drop the MongoDB Destination object from the Destinations section of the Toolbox onto the Dataflow.
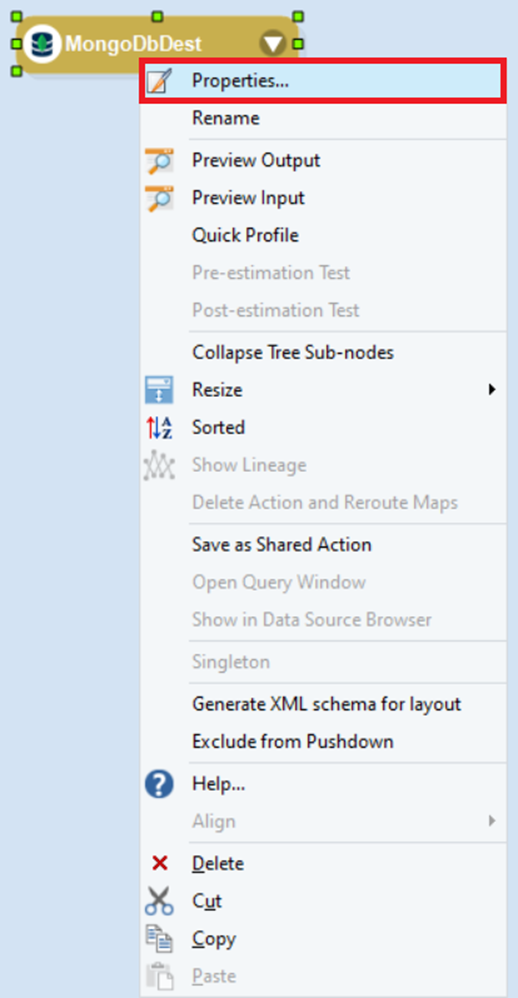
Right-click on the MongoDB Destination object and select Properties from the context menu.
This will open a new window.
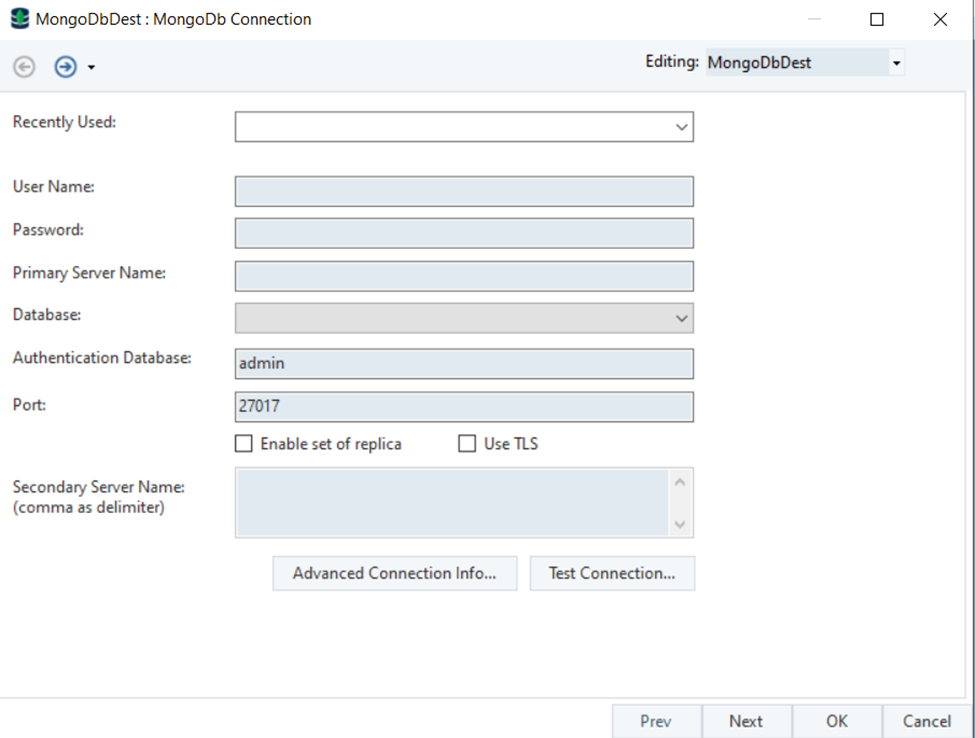
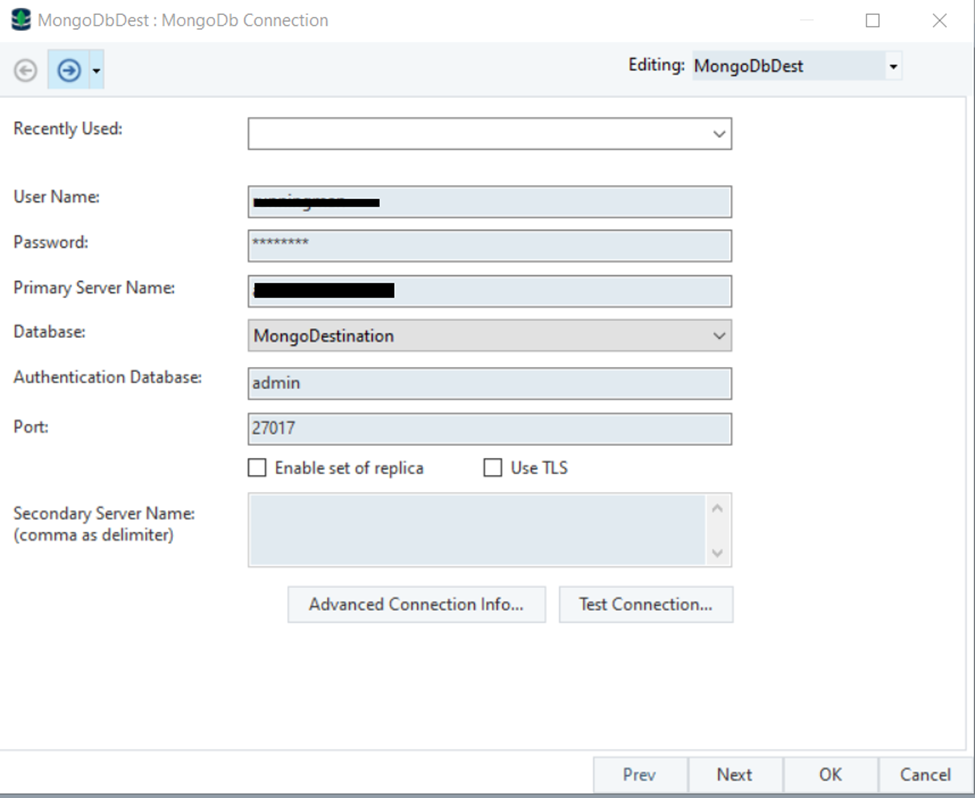
User Name: This is where we enter the user name of the MongoDB or Local Server
Password: The password of the MongoDB or Local Server is used here
Primary Server Name: The name of the primary cluster is used here
Database: This is where we select the database on which we wish to write the data.
Authentication Database: This is the database used for authentication.
Port: The port is used to handle incoming and outgoing requests to the server
Enable Set of Replica: Selecting this checkbox allows the use of a secondary cluster
Secondary Server Name: This name of the secondary cluster is used here
Use TLS: Select this option if the server requires TLS security.
Once your credentials have been filled, test the connection, and click Next.
For our use case, we have input the credentials to use the MongoDB Destination for our local server.
We will now be taken to the MongoDB Pick Collection screen.
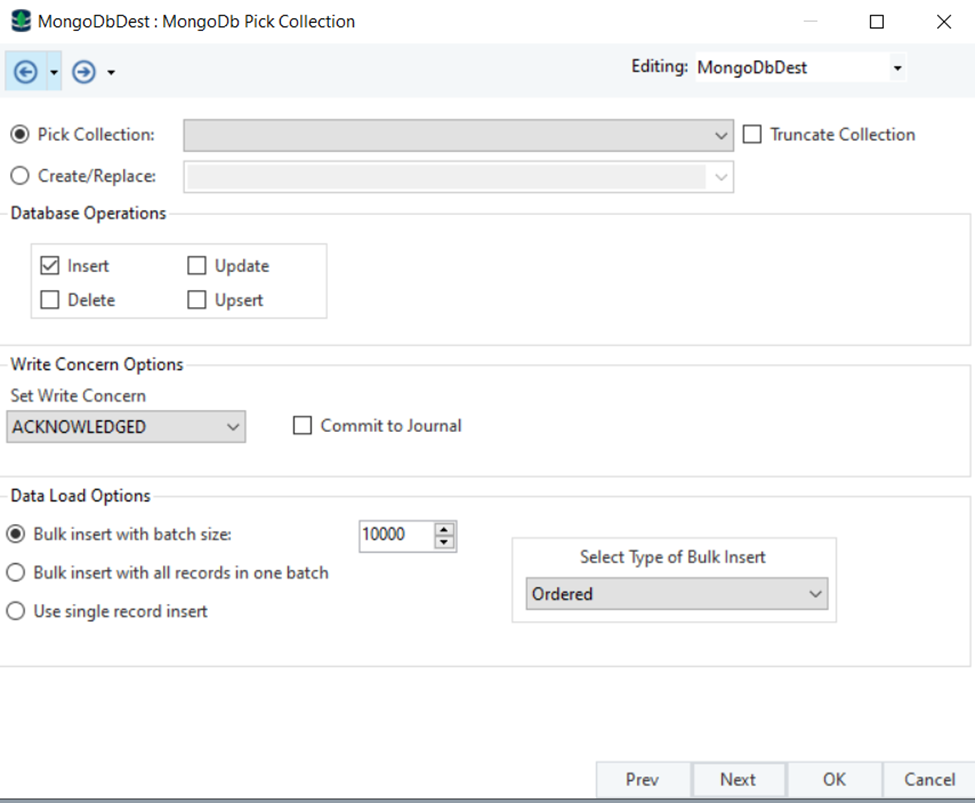
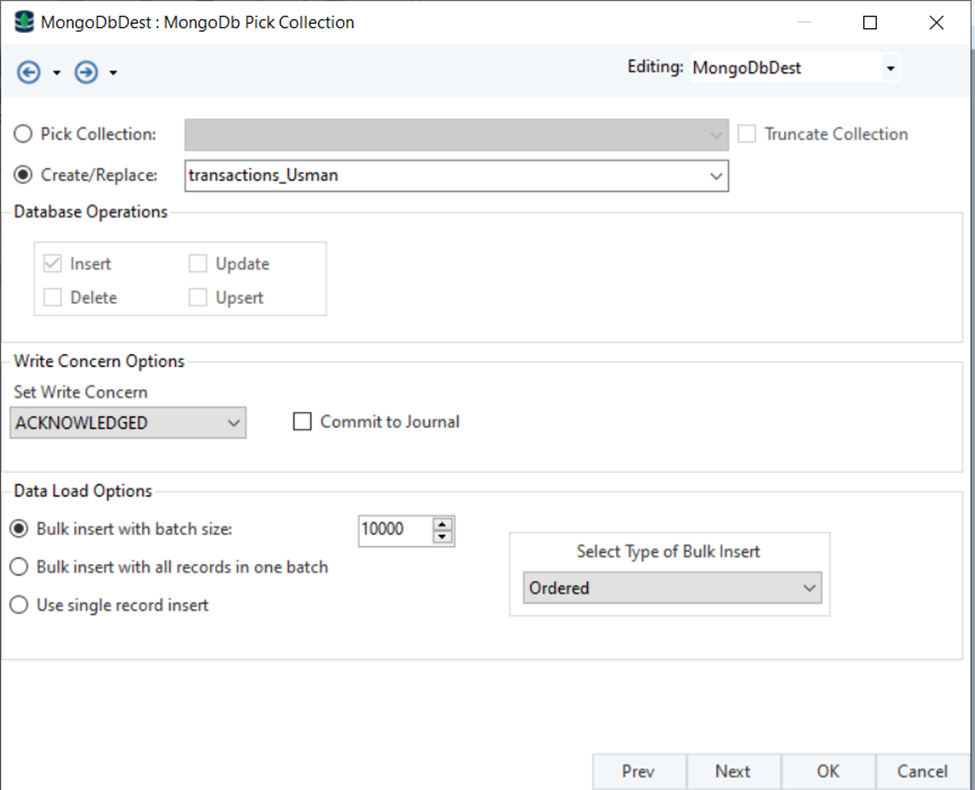
For our use case, we will select Create/Replace and add a new Collection.
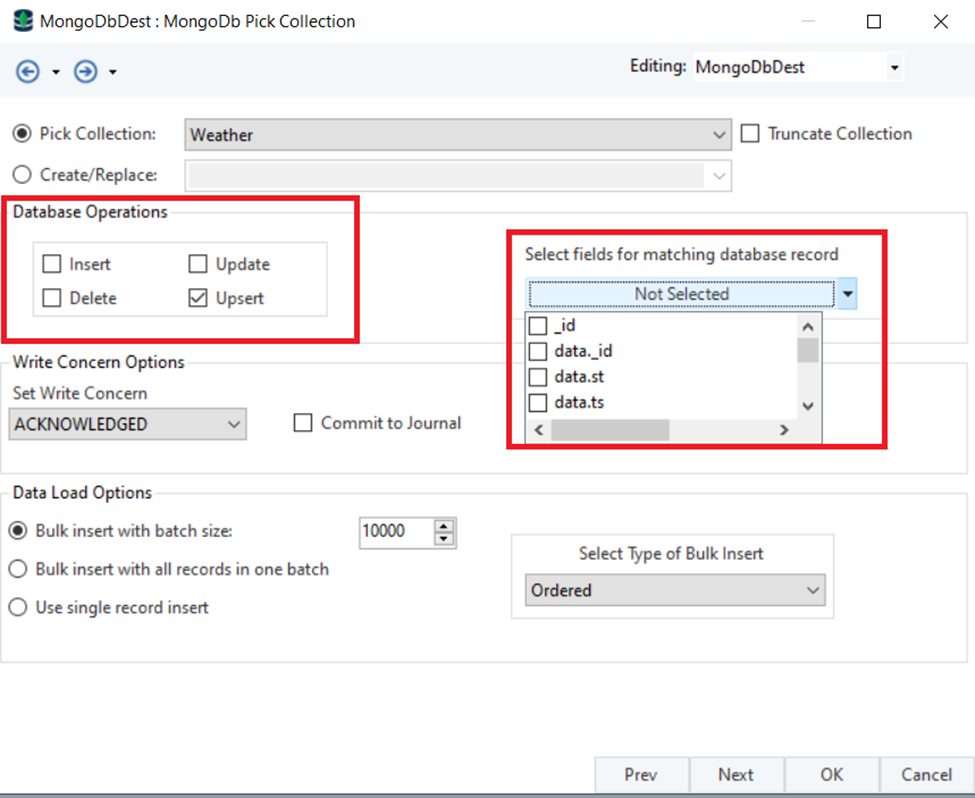
Database Operations – These operations are used when we are picking an already existing collection.
Insert: To insert a new record into the collection.
Update: To update an existing record in the collection.
Delete: To delete a record from the collection.
Upsert: To insert and update a record in the collection.
Select Fields for matching database records: Selecting from this drop-down menu lets the user select fields based on which to match the records for the selected database operation.
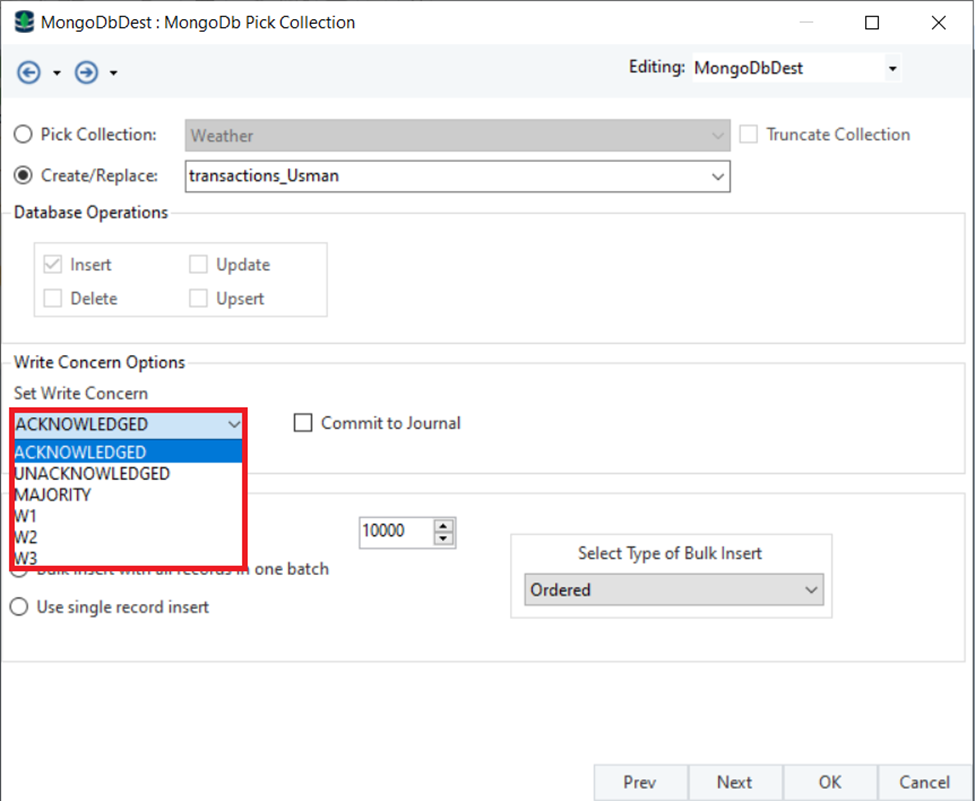
Write Concern Options – Selecting from these options lets the server provide an acknowledgment to the user based on how the process was carried out.
ACKNOWLEDGED: This will return an acknowledgment in the Job trace window if the process stops after getting an error or if the process successfully completes.
UNACKNOWLEDGED: This option will not return an acknowledgment, no matter how the data write is carried out.
MAJORITY: If there are multiple primary and secondary servers, this option will return when the majority of the servers have been processed.
W1: Selecting this option will return an acknowledgment when the primary server has been processed.
W2: Selecting this option will return an acknowledgment when the primary server and one secondary server have been processed.
W3: Selecting this option will return an acknowledgment when the primary server and two secondary servers have been processed.
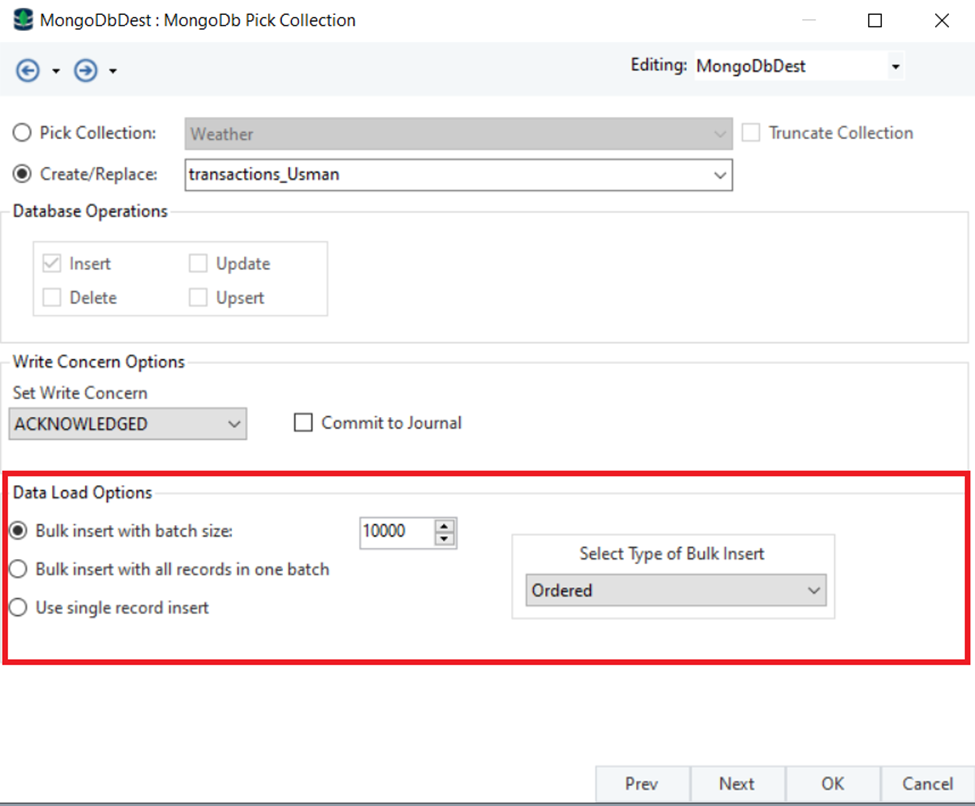
Data Load Options – These options let the user define how the data is going to be loaded into the database.
Bulk insert with batch size: This will insert all records divided into batch sizes that the user has defined.
Bulk insert with all records in one batch: This will insert all records in a single batch.
Use single record insert: This option will treat every record individually and insert them one by one.
Select Type of Bulk Insert: Selecting from this drop-down menu lets the user define whether the Bulk Insert will be Ordered or UnOrdered.
In the case of Ordered, data writing will be stopped if an error is encountered between record insertions.
In the case of UnOrdered, data writing will continue despite any errors being encountered.
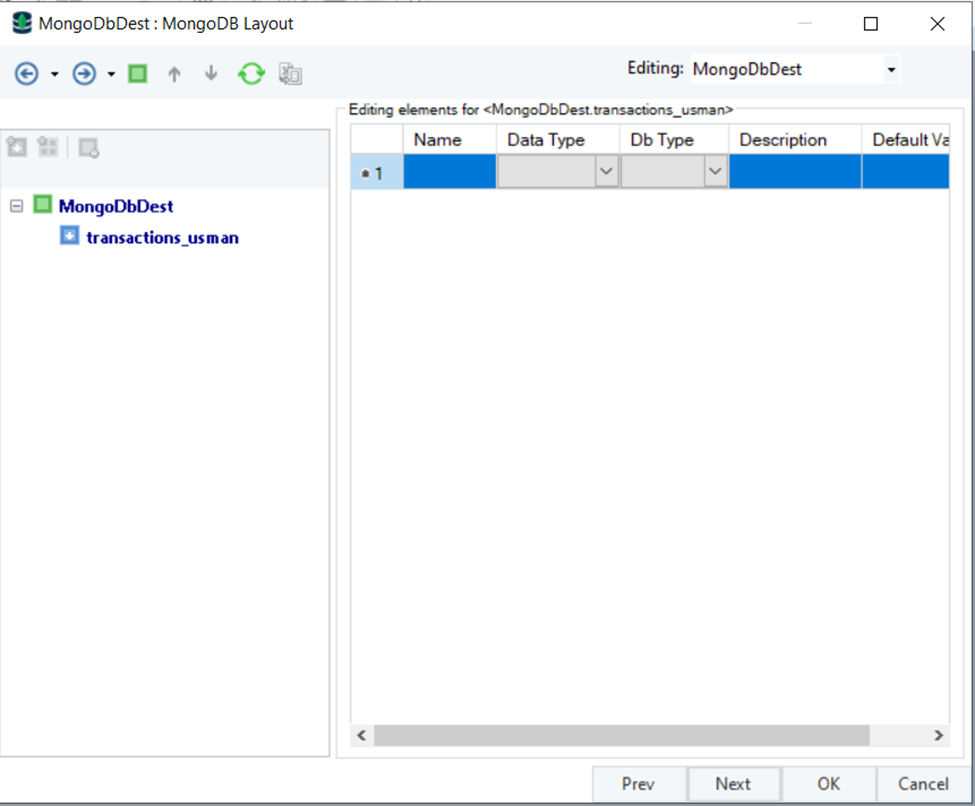
Click Next and you will be led to the MongoDB Layout screen.
Currently, our layout is empty since we have not mapped any fields to it.
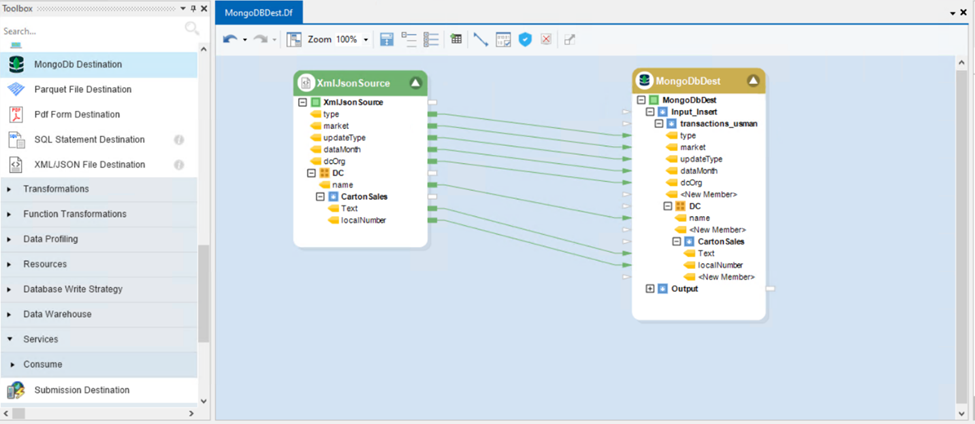
We will map the incoming fields from the XML/JSON Source object to the MongoDB Destination object.
We will then reopen the MongoDB Layout screen.
As you can see below, the entire layout has now been defined.
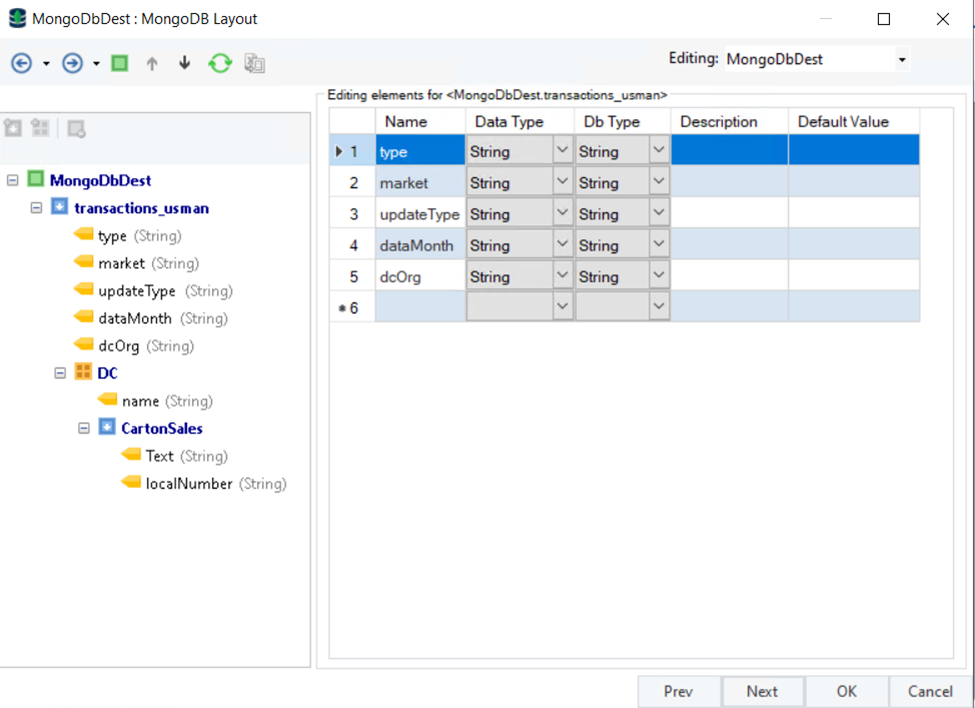
Click OK and the MongoDB Destination object will be configured.
Select the Start Dataflow option in the main toolbar and the data will be written to the destination.
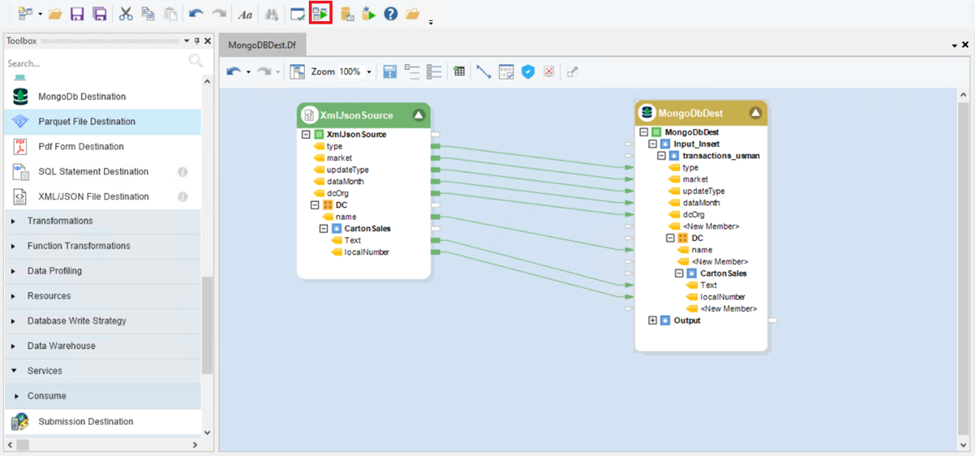
As you can see in the Job Progress window, the data has been successfully written to the destination.
Note: You can see the acknowledgment in the window since we selected the respective option.

This concludes the configuration of the MongoDB Destination object in Astera.
Was this helpful?