EDI Message Serializer
Overview
An EDI Message Serializer is used to build an EDI Message in the required EDI partner profile before the message is written to a destination. The serializer helps ensure that the message follows the required format specified by the partner.
In this document, we will learn how to use an EDI Message Serializer in Astera.
Video
Use Case
In this case, we will be building an EDI message using data available in an XML/JSON File Source.
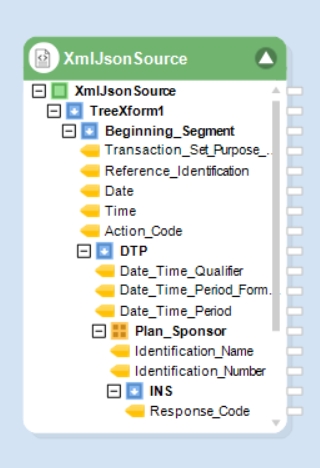
This XML source represents the beginning segment of an X12 834 transaction set, providing information about a change in enrollment or benefits for an individual sponsored by a company.

We want to convert the hierarchical information, contained in multiple segments, into a single text stream.
To perform this task, we will use the EDI Message Serializer object in Astera.
Using EDI Message Serializer
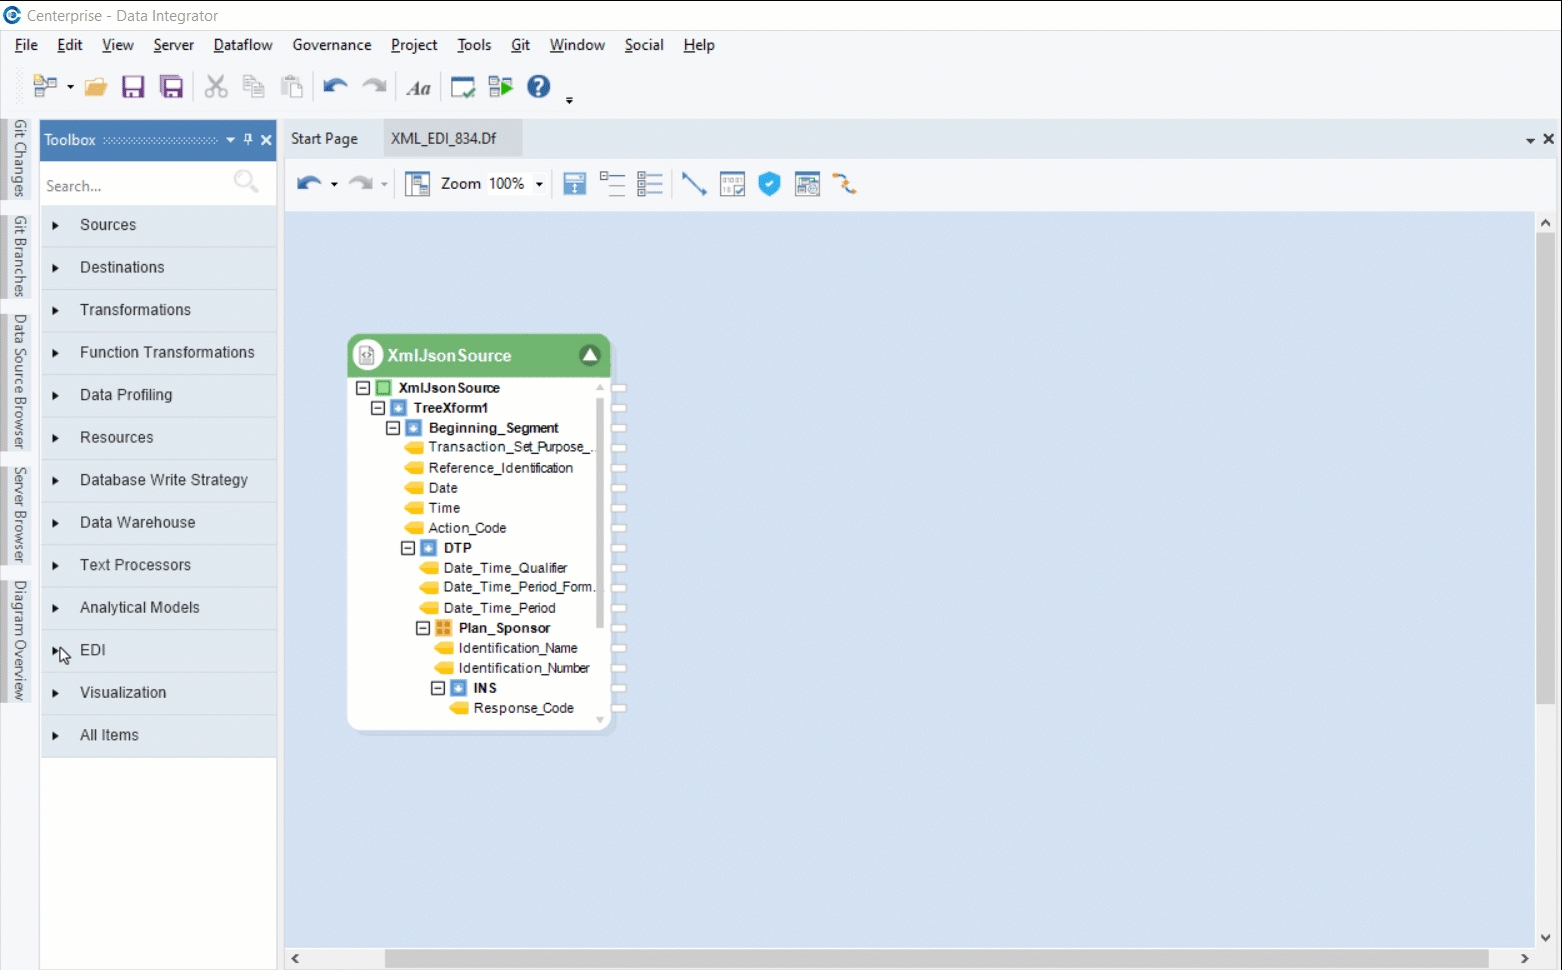
To get the EDI Message Serializer object, go to Toolbox > EDI > EDI Message Serializer and drag-and-drop the object onto the designer.
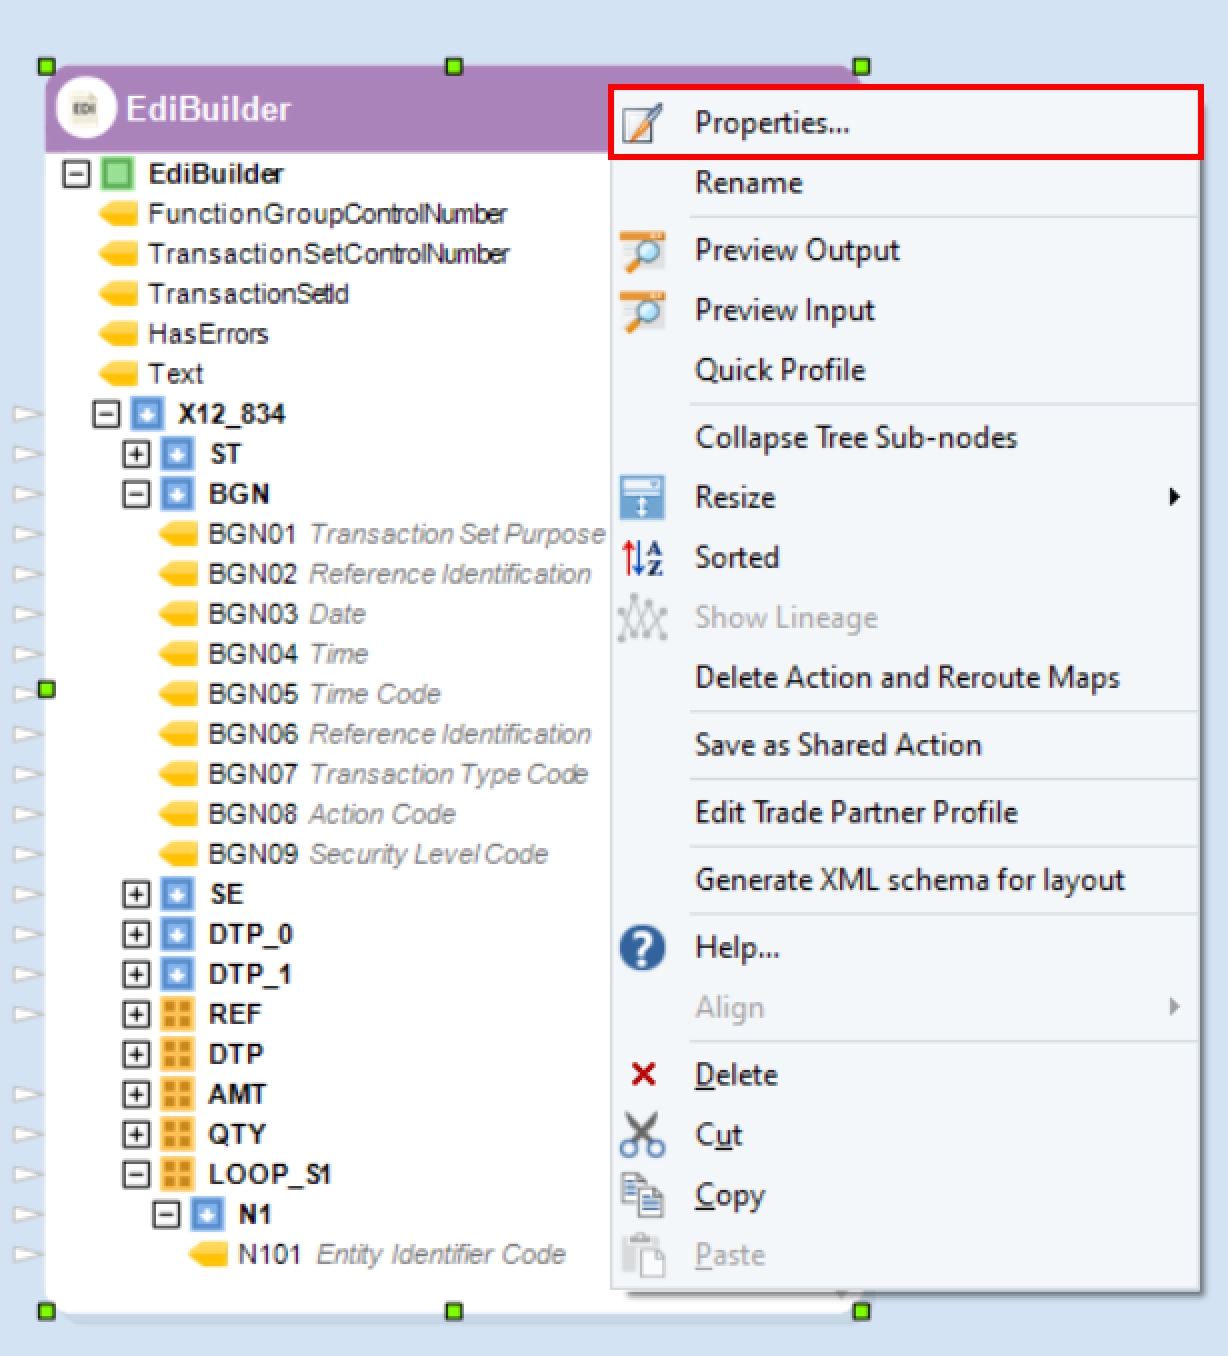
Right-click on the EDI Message Serializer object’s header and select Properties from the context menu.
A configuration window will open, as shown below.
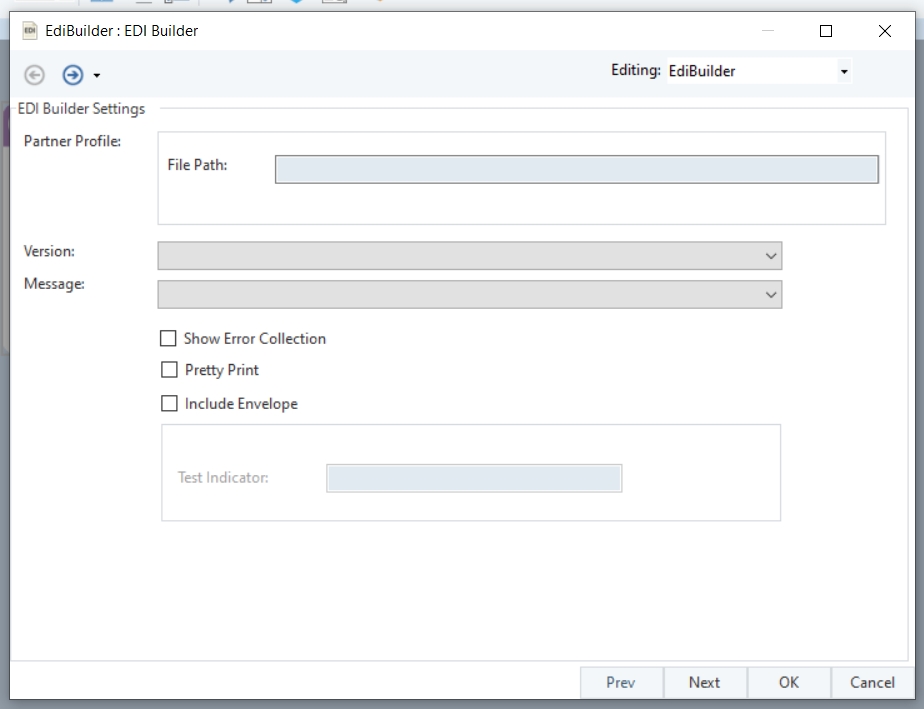
Let’s look at the properties on this window.
Partner Profile – Fetches all outbound maps based on the partner profile provided.
Version* – Allows users to specify the version they want to use to build their message.
Message* – Allows users to specify the type of message they want to send.
Show Error Collection – If selected, an error collection node will be added to the object, containing details of any errors in the message.
Pretty Print – If selected, when the output is previewed, it displays the text of the message in a more readable format for users.
Include Envelope – If selected, the object will include input and output nodes of metadata and control information for the message.
Test Indicator – Allows user to specify any testing/debugging/validation indicator that may be used in the header or control segment of the message.
* Options shown in this dropdown menu are limited to those defined in the partner profile.
Now, let’s configure the properties based on our use case.
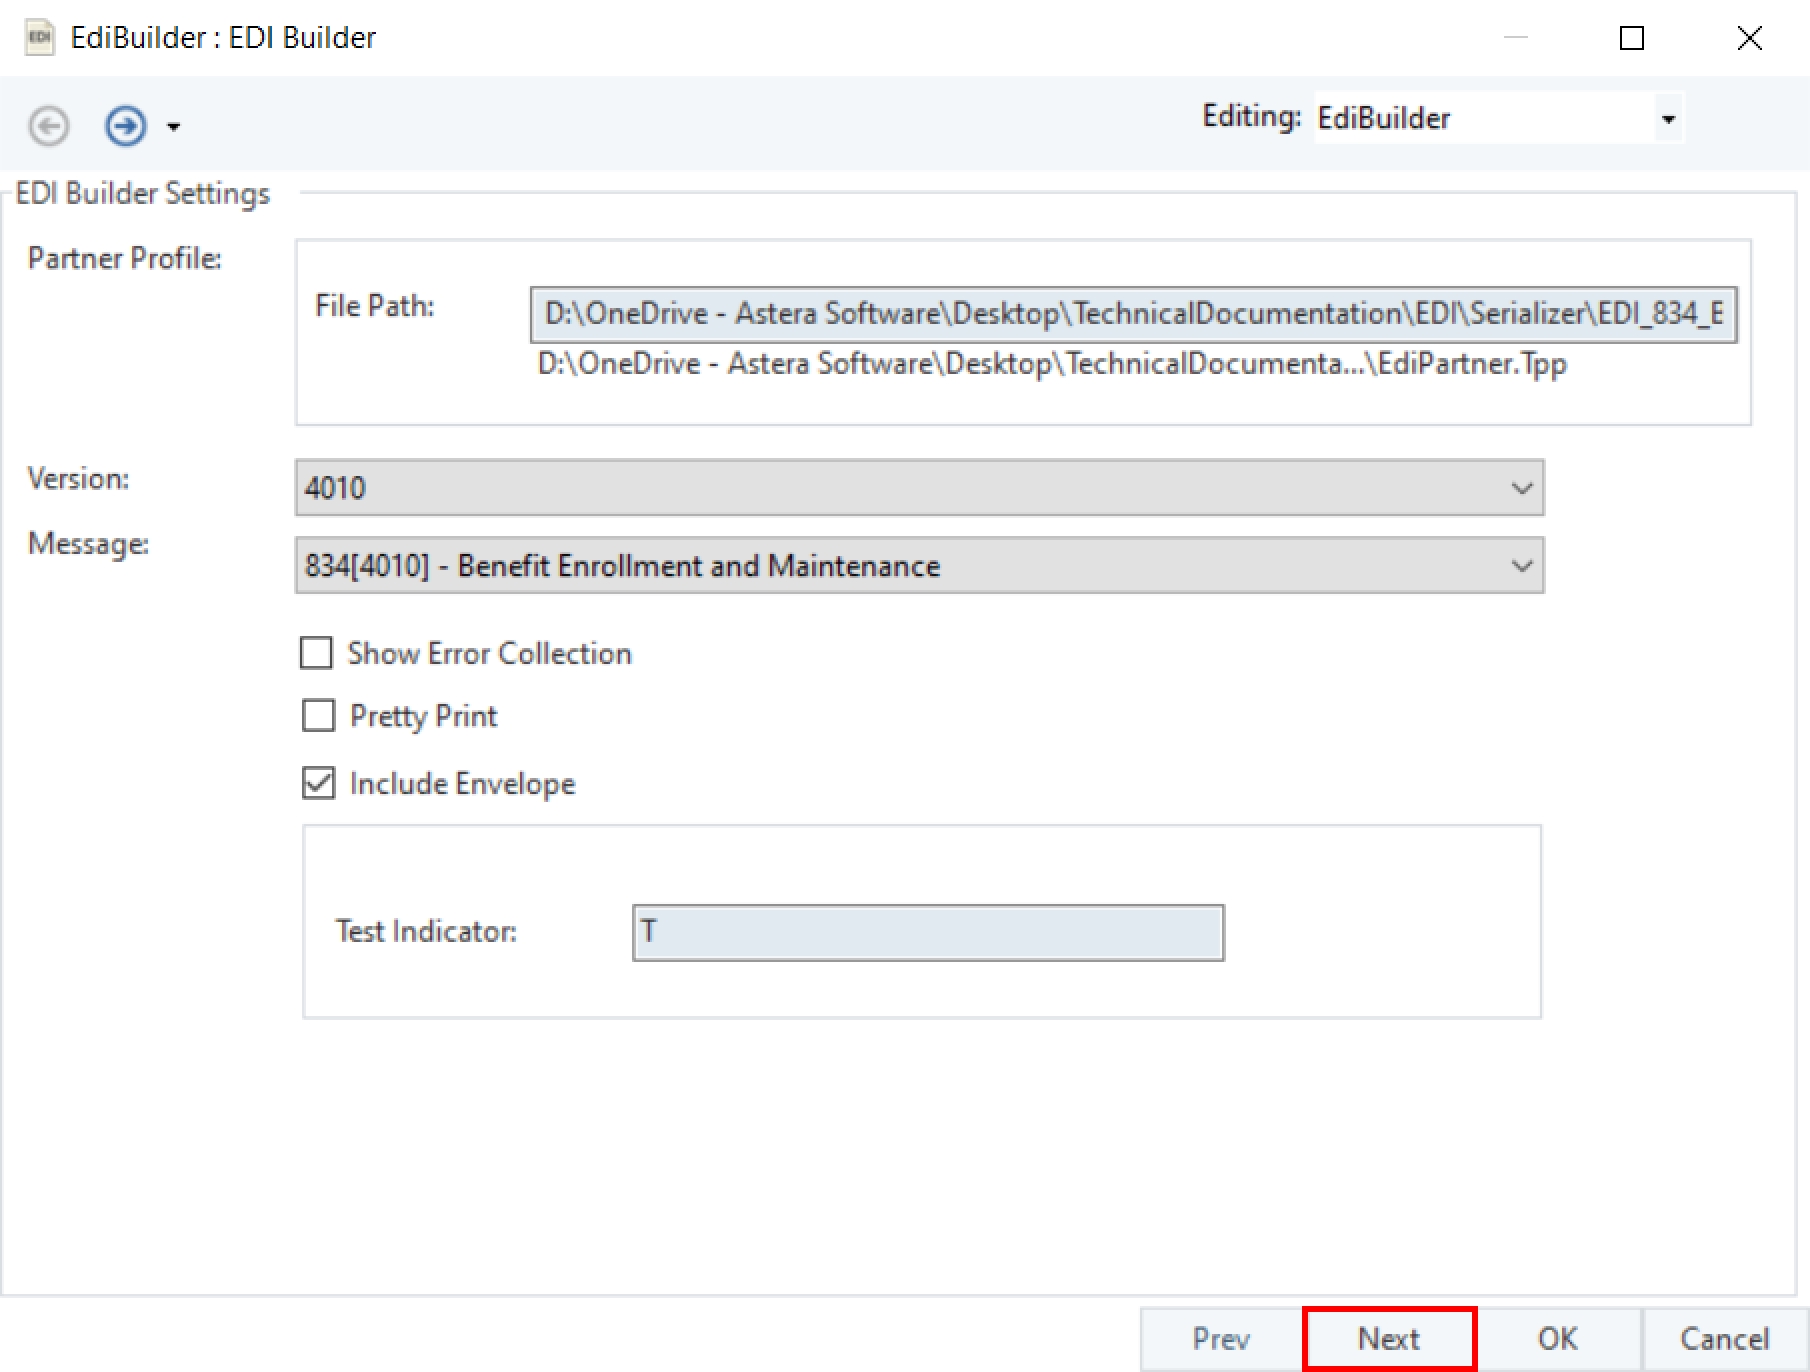
Click Next. The Layout Modifications screen will open; here, users can choose to show, flatten, hide, sort, or add formulas to each node of the message.
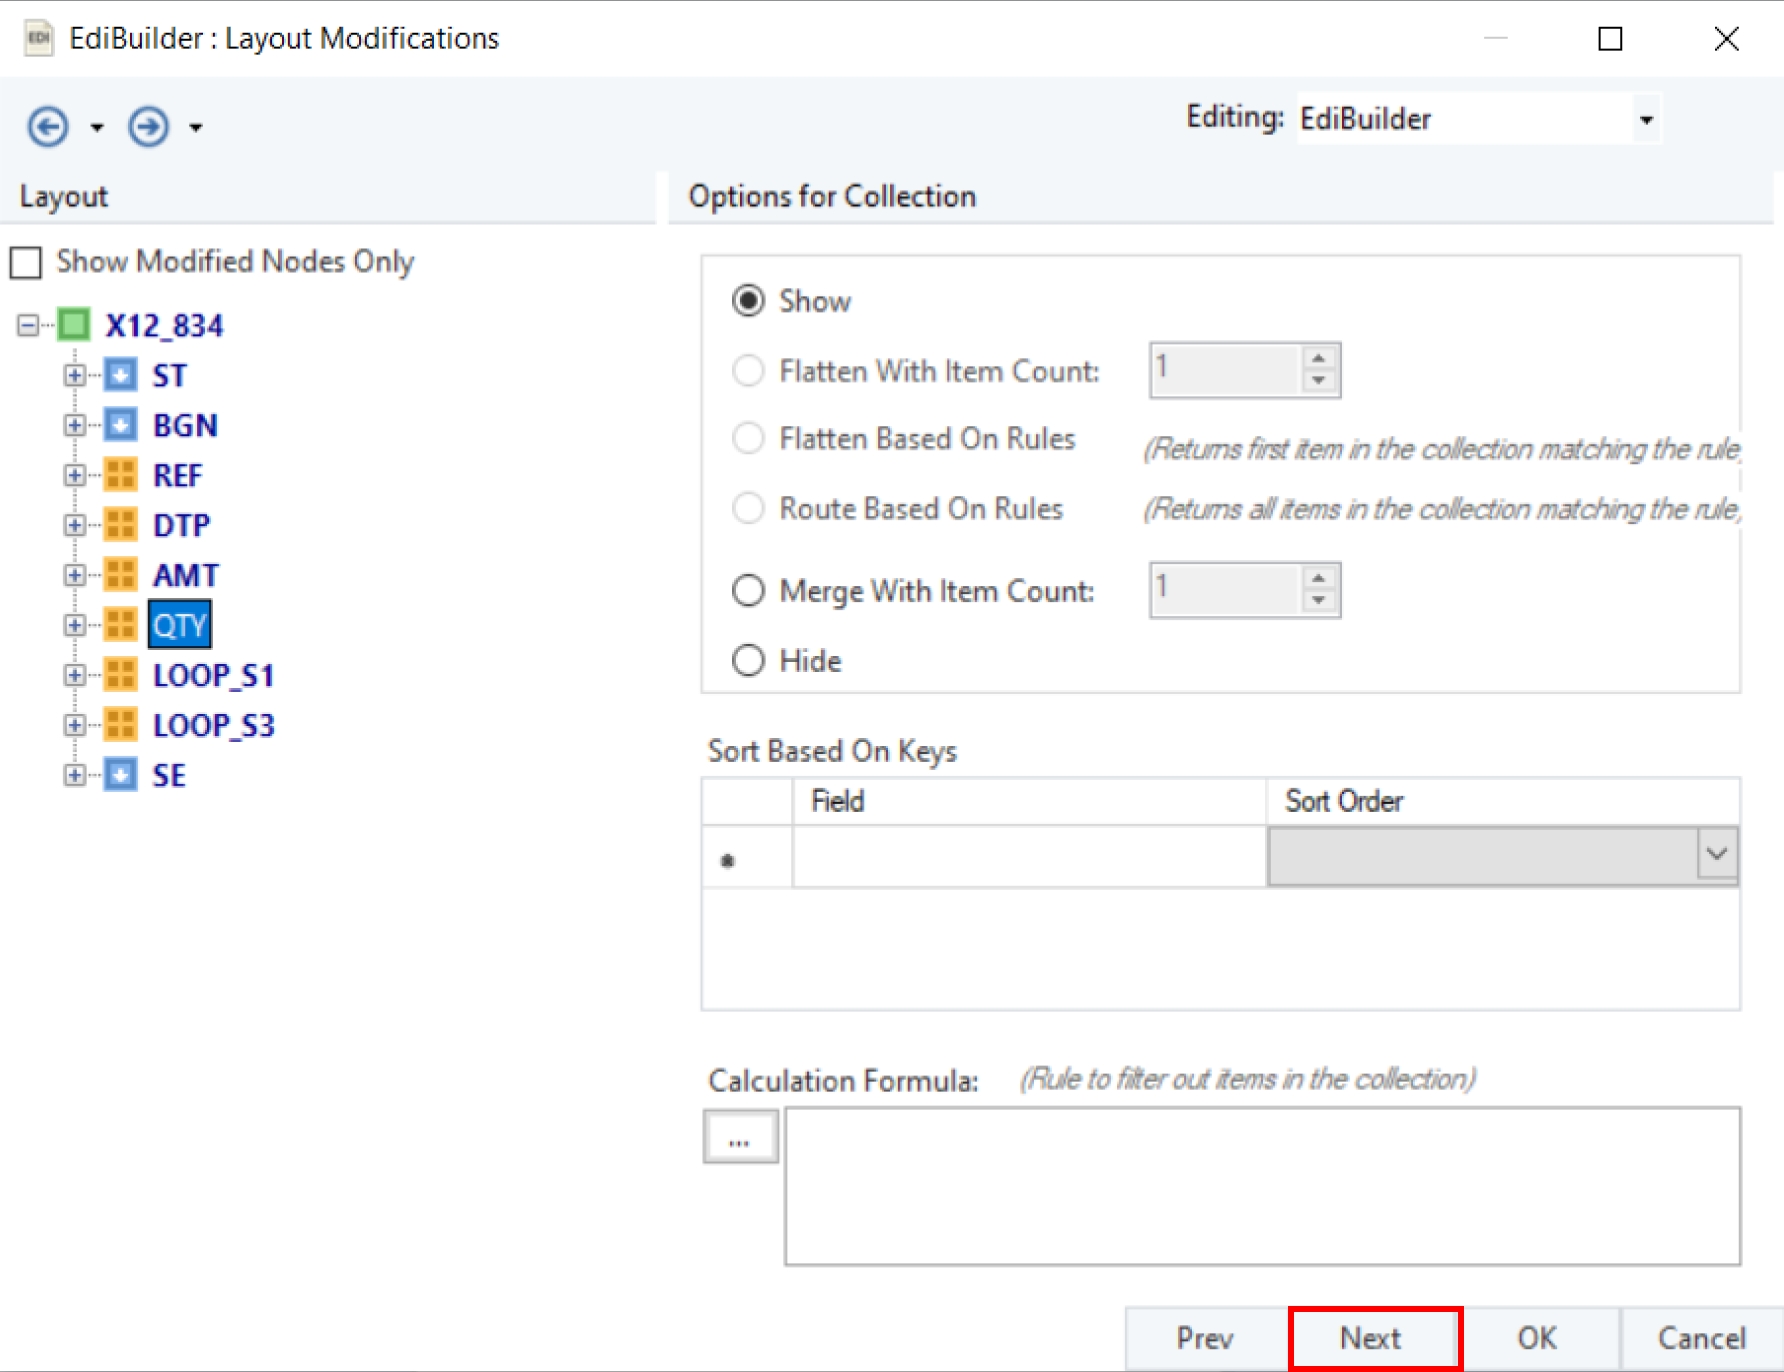
Let’s keep the default layout and click Next. The Config Parameters screen will open; here, we can configure and define a parameter for the Trade Partner Profile file.
Use of Parameters eliminates the process of inserting hardcoded values and provides simplification in the deployment of flows. If the parameters are left empty, the default values defined at the Properties window are assigned for use.
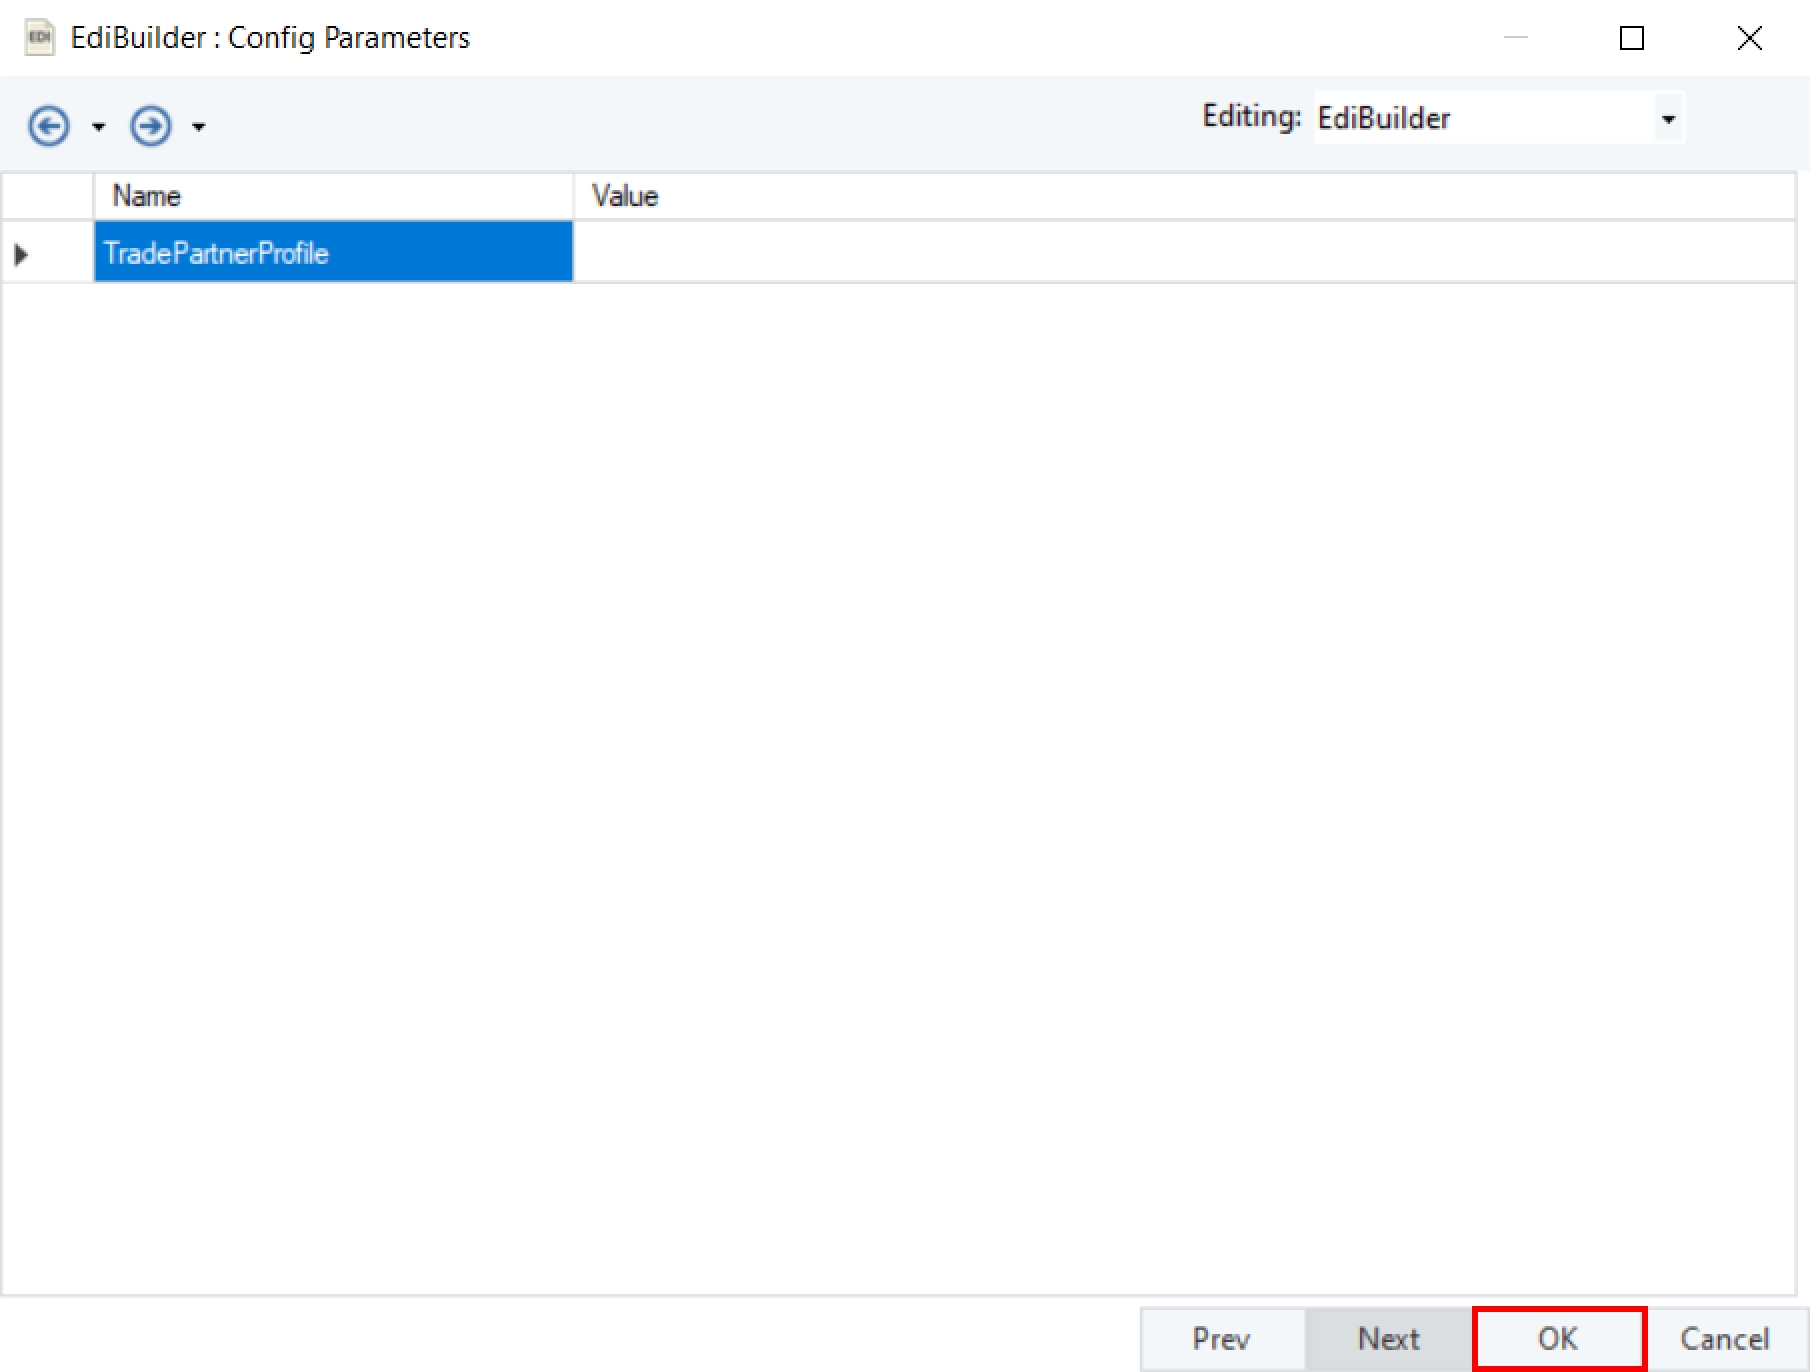
Now, click OK, to proceed further.
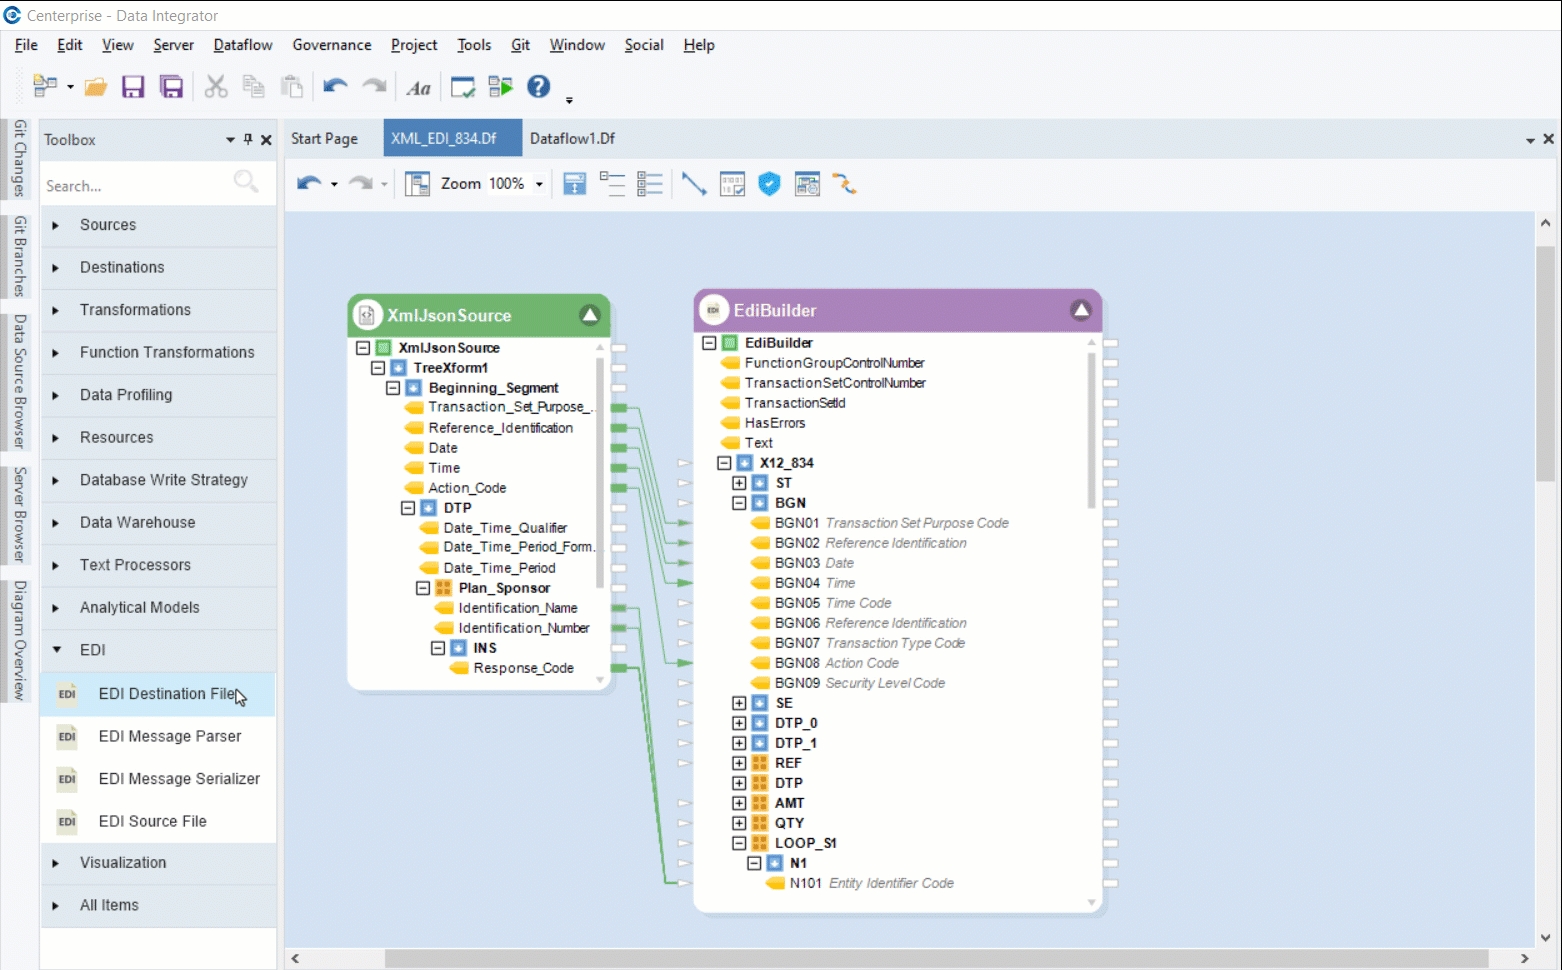
Map the fields of the XML/JSON File Source object onto the EDI Message Serializer object’s fields.
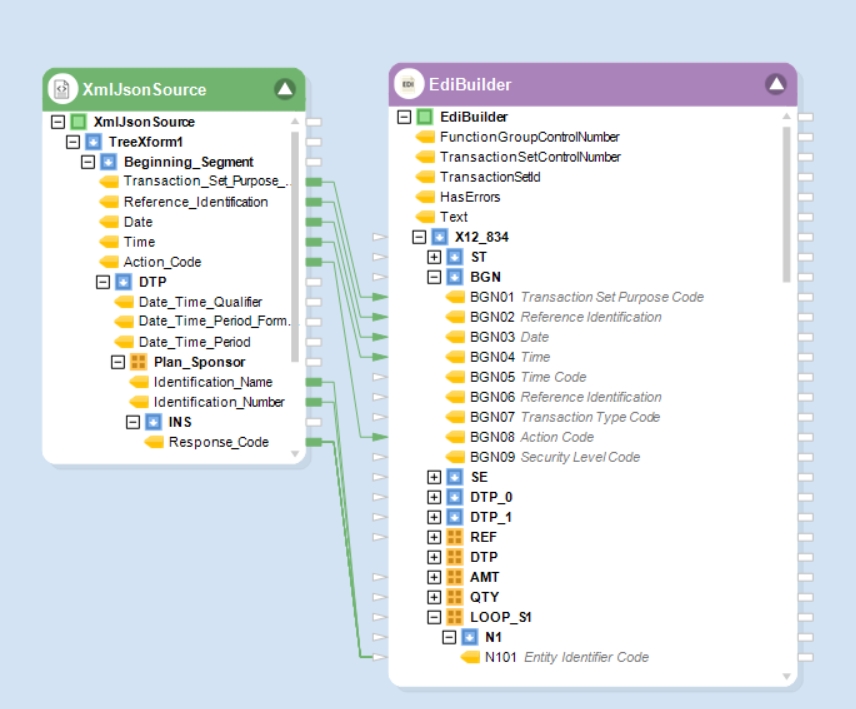
Right-click on the object’s header and select Preview Output.
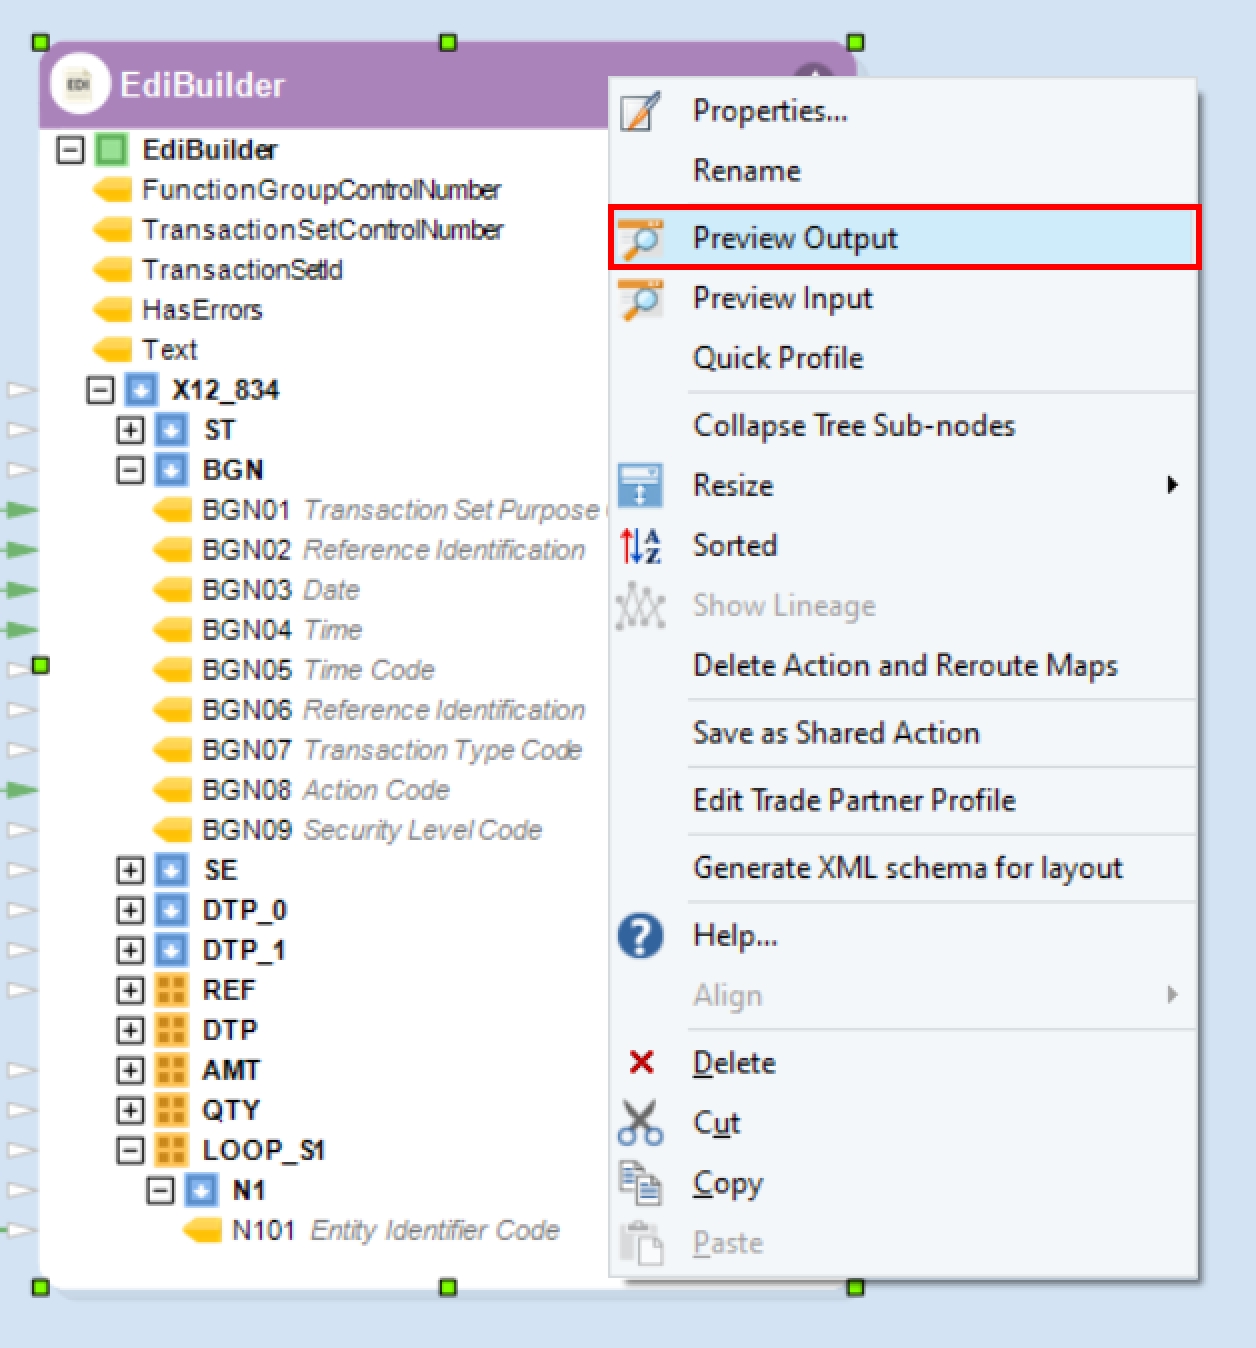
You can view the data through the Data Preview window.
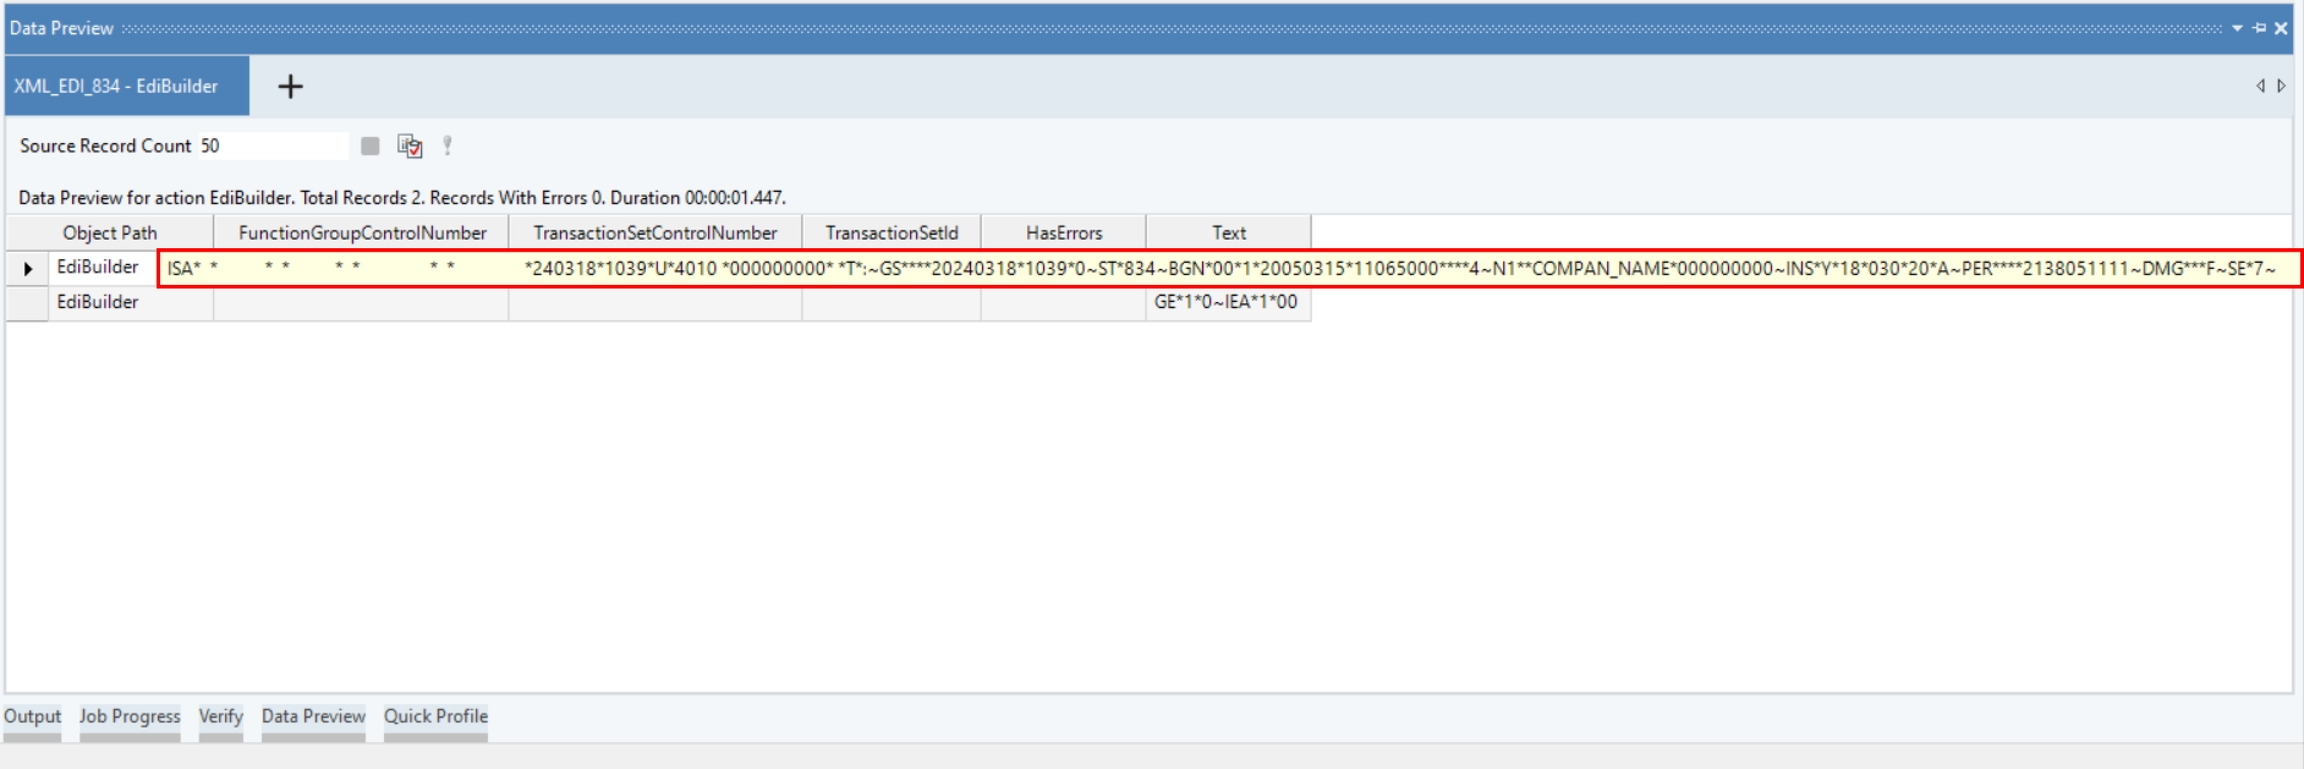
Hover over the Text field and you will see the serialized EDI message.
To validate and store the serialized output, we must write it to an EDI Destination File.
Let’s drag-and-drop an EDI Destination File object from the Toolbox and auto-map the metadata fields along with the Text field onto it.
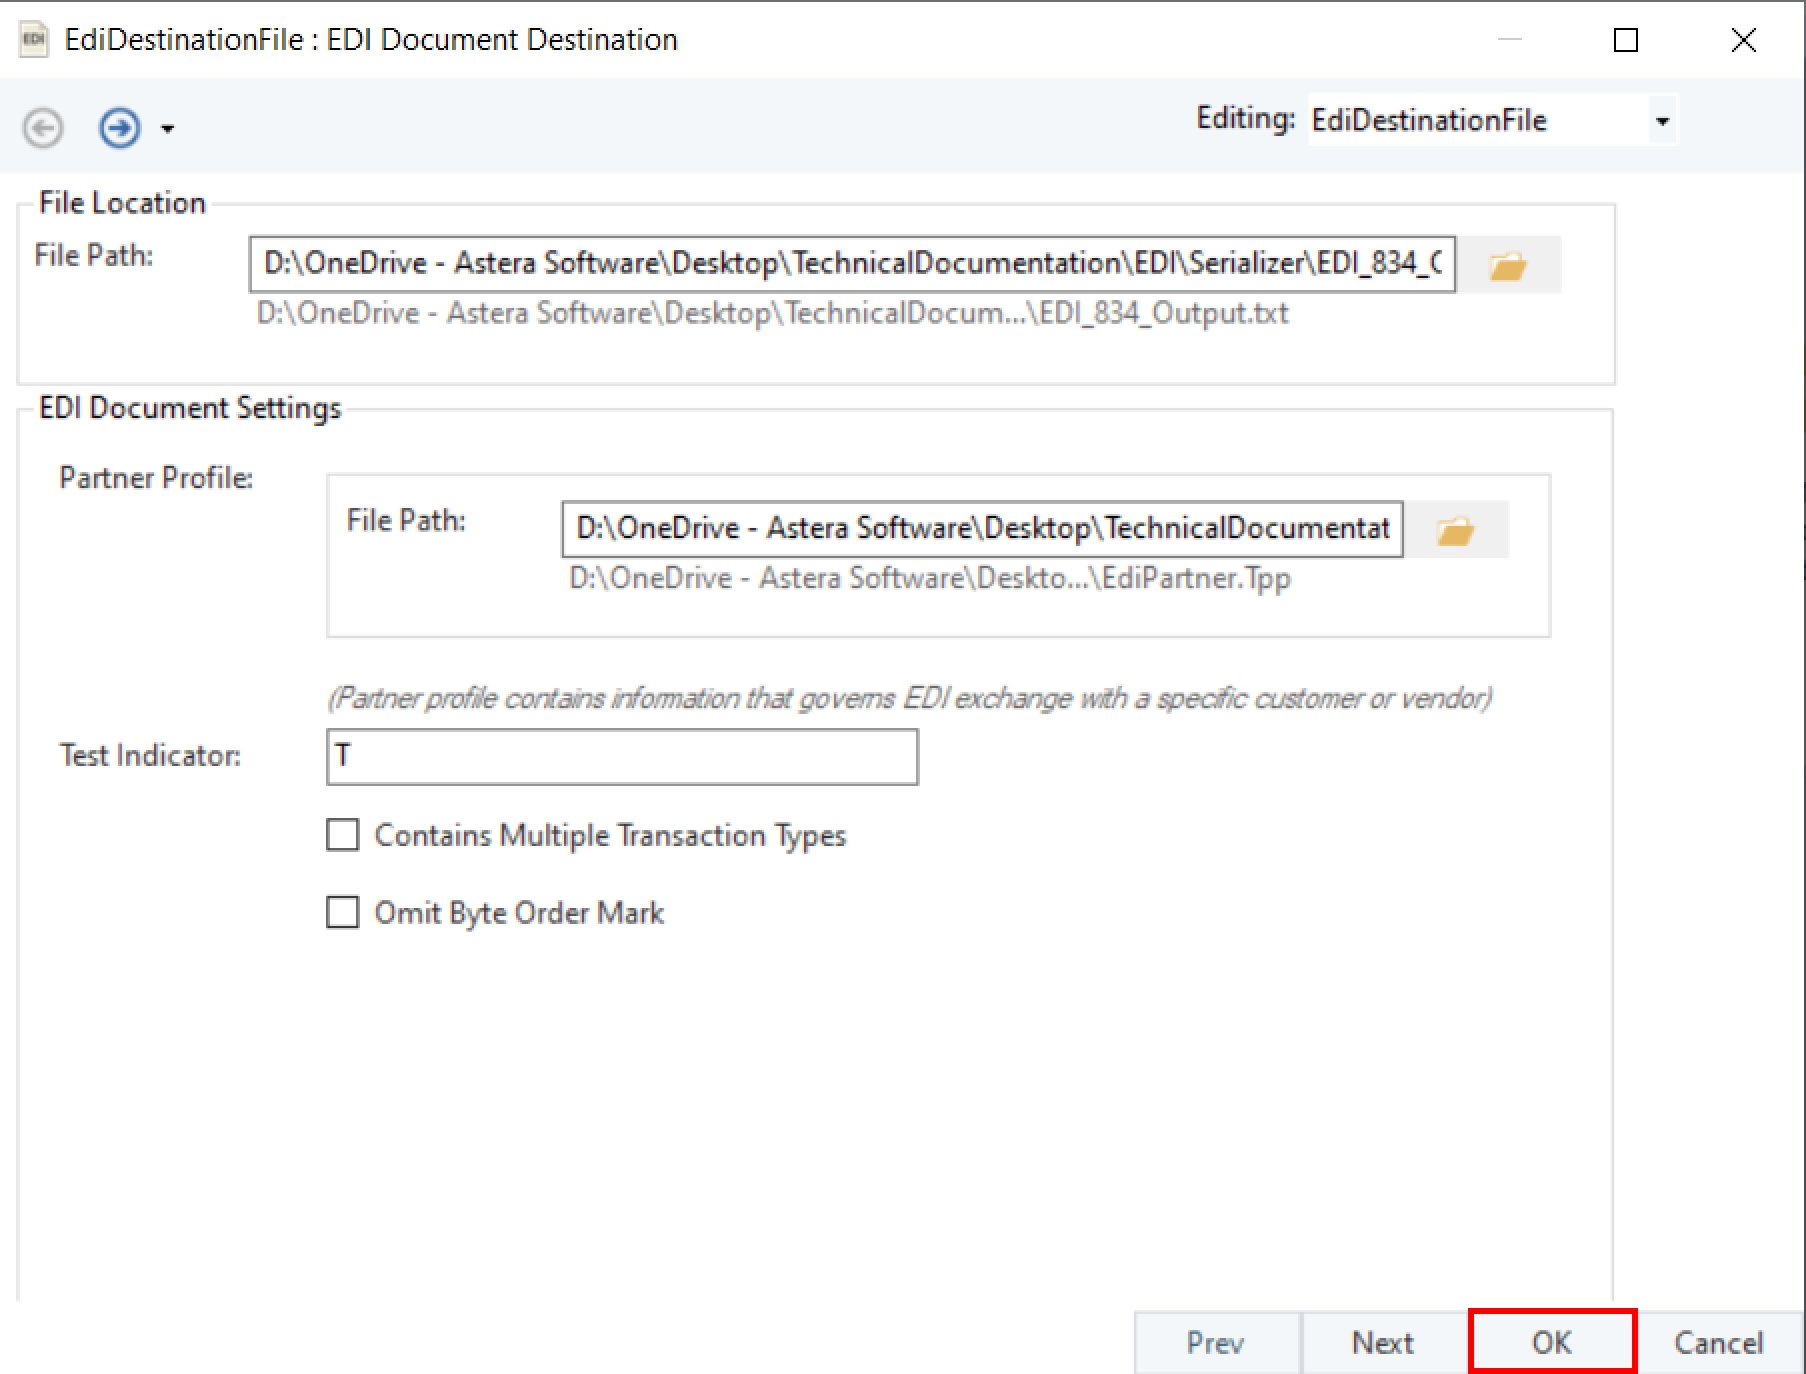
Let’s configure the Properties of the destination object and click OK.
The Dataflow is now ready. By running this Dataflow, you can now create an EDI destination file containing the serialized EDI message.
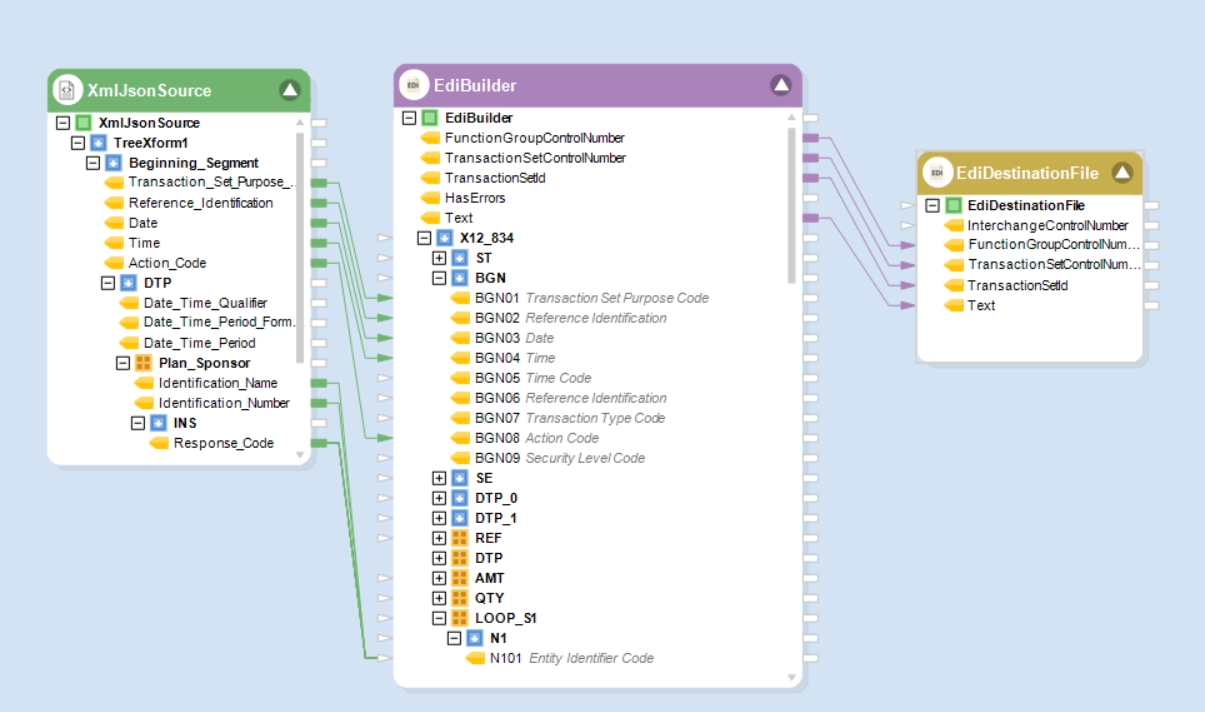
This is how an EDI Message Serializer object can be used to build an EDI message in Astera.
Was this helpful?